Mirage’s PFR & IFL
It’s been a while since I did post in here, in fact been even longer since i did post about Mirage. But during that silence, i was still working on…Let’s say some different “Stuff”. And one of the main things I was casually working on during that time was defiantly Mirage.
There are a ton been made in Mirage, really a ton of things, starting from tiny things in loading files, writing files, or re-integration of the entire UI, up to complicated things such as full PBR bones skinned and animated meshes. Today however i want to spot something specific, which is the PBR & IBL rendering itself, regardless what type of mesh data been rendered. And as you might have noticed i put a title for the post as “PFR” to stand for Physically Faked Rendering! And “IFL” as you might have guessed to stand for Image Faked Lighting!
So why I do call it like that?
Well, before adding the full PBR support in Mirage, all what i knew about the PBR approach is the overall idea, what we see at the engine user end of something like Unreal or Unity or even any other engine that support PBR, no more details. Just use specific textures (roughness, metallic,..etc.) to define the surface being rendered. And that’s all of it!
And so as my idea about the image based lighting, just put an image to the environment cube, and it is used to light the scene.
But when the time came to implement it, i needed to start reading a lot more in depth about the process (At the end of the post, I’ll leave all the links for the articles that helped me to understand and implement that), but at the end of the day, it turns out to be another “emulation” to the feature. Like every thing else about rendering, it is faked emulation, stating from the basic movement of the camera in 3d scene up to things like shadows, caustics & everything else in rendering (Pre-RTX may be) need to be faked in order to give the feeling of it’s existence. Same way we fake that shadow been casted by a mesh and light source, we also fake that there is actual real environmental light and real surface definition for a set of polygons.
Anyways, so how that thing works (IMO) ?
1. SkyBox
We create a cube mesh (or load one), that will surround the entire scene, this will simulate the sky itself. And that’s why it is common to be called the “SkyBox”. I did knew that, but what i didn’t is as follow:
The skybox shader itself, is actually the simplest shader here, nothing fancy at all about it! Just a shader to wrap a mesh with texture!
One thing to keep in mind here, that this skybox mesh model matrix will need to match the view matrix, this way, when we zoom or move around the scene, the skybox remain far away from reach, and most importantly feels like a skybox!

2. CubeMap
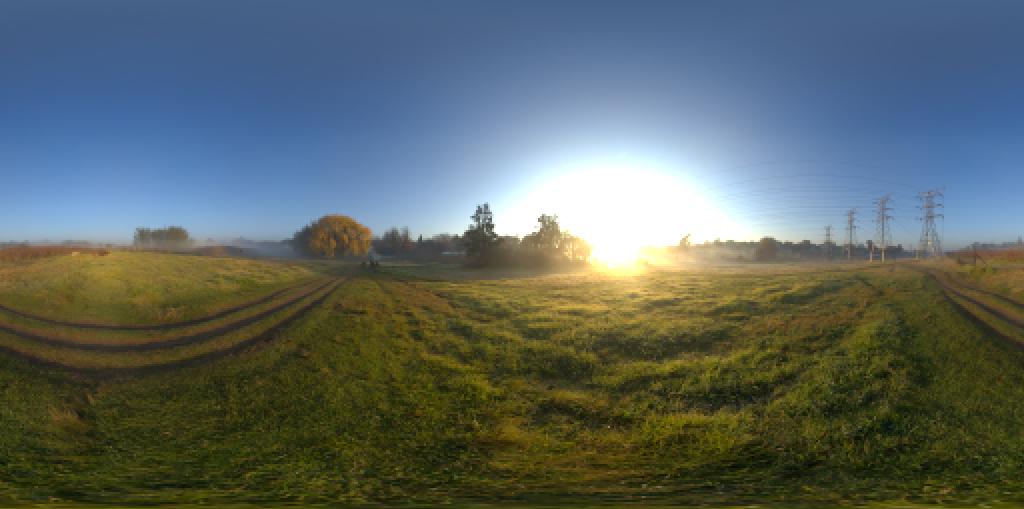
That cube (aka sky) with that basic shader we mentioned, will not use just a simple texture to wrap the surface of the sky. Nope, it’s a 6 faces texture applied to it, this is called “CubeMap” (if u r not familiar with it), this is usually comes with the format of HDR (the type and format will actually depend on many things, my first implementation was actually a normal 6 textures stitched, and later i did support the read of HDR & KTX fiels).
btw, you can get a ton of pretty ones from the HDR Labs: http://www.hdrlabs.com/sibl/archive.html
3. Light
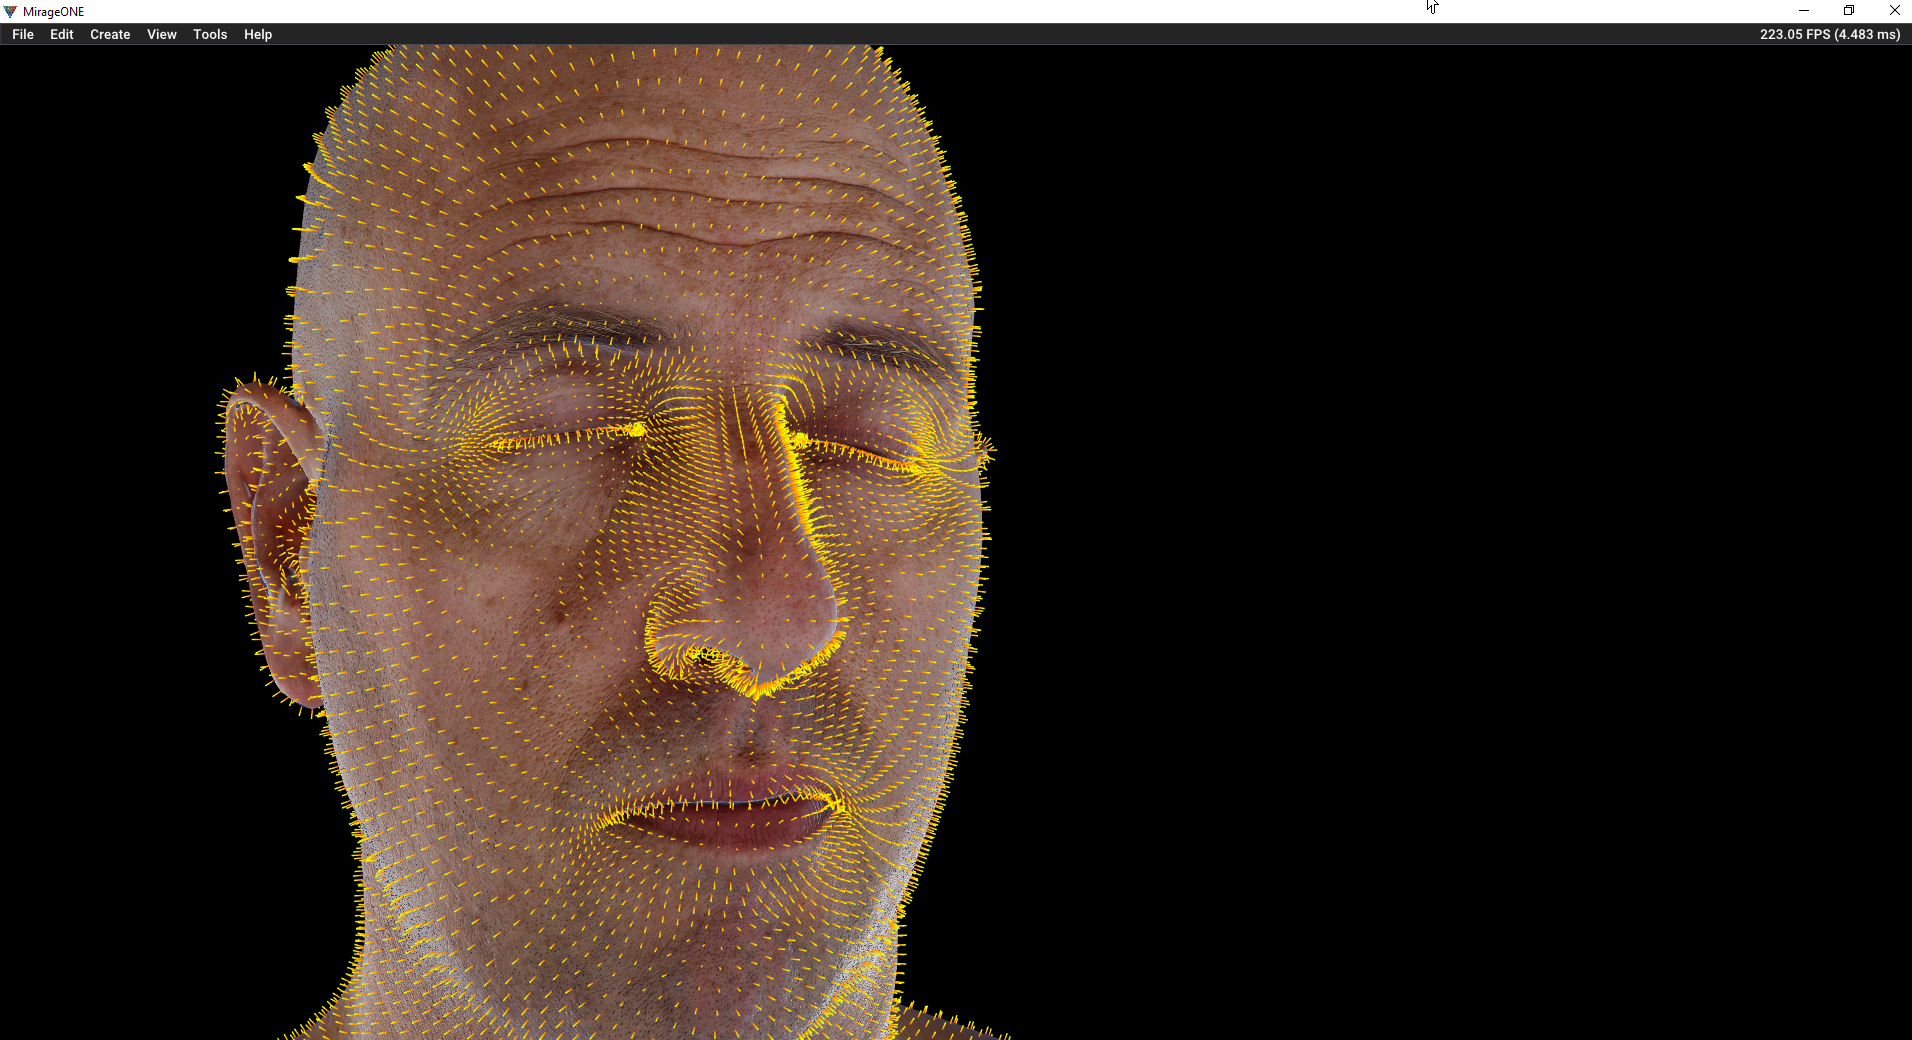
Now the trick of using this image to light a scene/object is actually very simple, in every inch of the mesh (at pixel level, so better to say at every pixel the mesh is occupying at screen), we check the normal of it (vertex..or face? you guess!) and using this normal to get the color from the SkyBox texture, this will be basically the light color that will be sampled to this area of the mesh, and It’s why i’ve decided to work for a while in adding a new visualizing mode to show surface normals.
4. Irradiance CubeMap
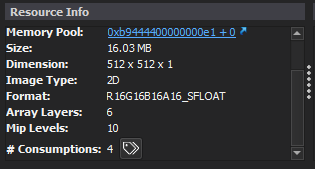
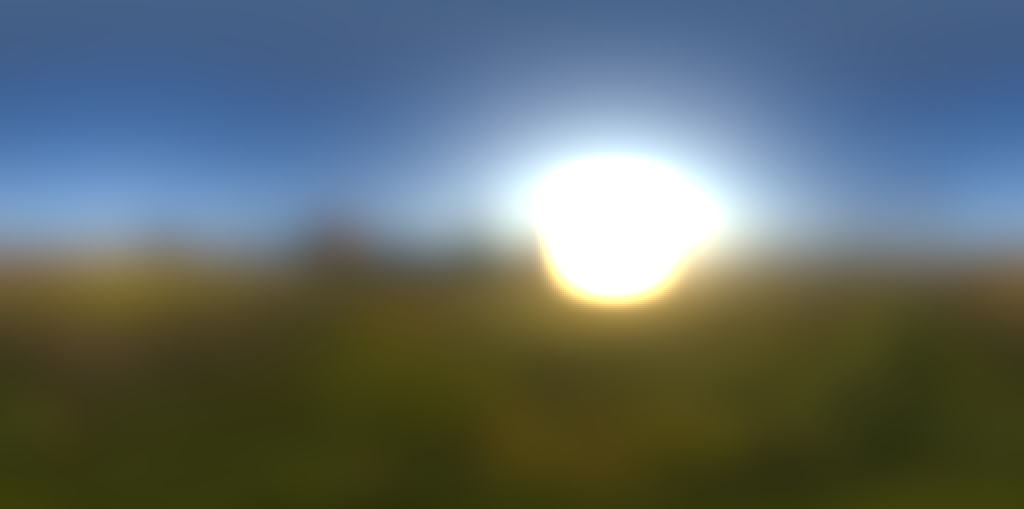
But we now have an issue! This HDR CubeMap image have a ton of pixels that might have a huge range of colors data, This; First, will be very consuming at runtime. Second, won’t be efficient or even give good lighting results (no smooth lighting), and for that we have to take that huge HDR 6 faces CubeMap image, and re-generate a smaller & “blurry” version of it that holds a lot less information (not actually less, but more usable to light a scene), which called Irradiance CubeMap (the name makes perfect sense for the job!)
More useful screenshots about the irradiance at the debugging section below.
5. BRDF
Another texture we need to generate, which called BRDF, this one is basically the core reason to call the entire process “fake” as this texture is nothing more than pre-defined values for the surface/material roughness and camera view angles. It is like a table of values, that we look up through it at run-time while calculating the final color of each fragment (that belongs to an object using the PBR shading) on the screen. If we follow the standard common values, we will always get the exact same visual of that texture that is used in most common engines.
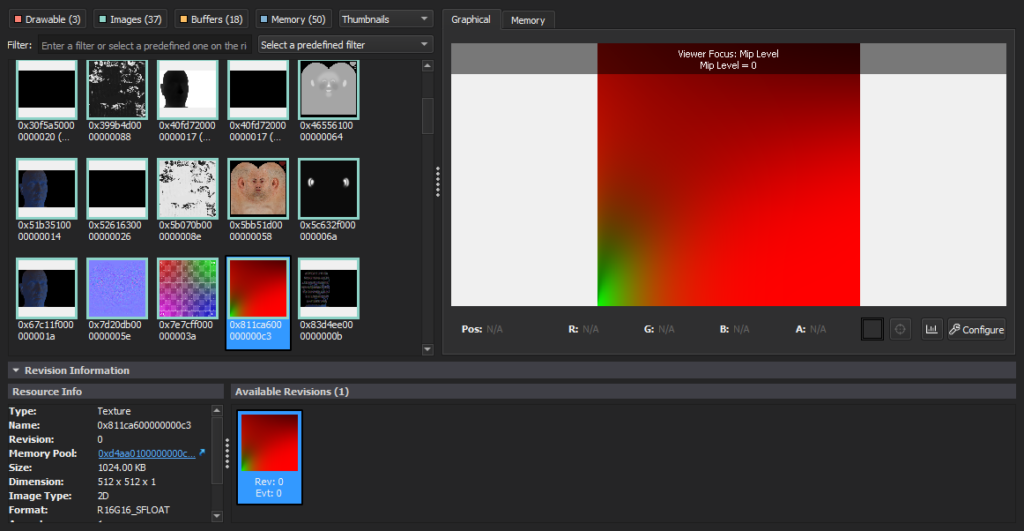

6. PreFiltered CubeMap
And one more texture to generate, which is usually called “PreFilteredCubeMap”, which is dedicated to the specualr values based on the surface roughness (or roughness texture map if I would say at this moment). This texture idea is very simple, it is basically a series of mip-maps of the CubeMap, the mip 0 which is the most clear one, will represent a surface with roughness of 0.f, which means it is not rough at all. And go up in the chain of mips, until reaching the last mip-map of the cubemap, which is an equal to the roughness of 1.f.
One thing to highlight here, all those textures are generated at the beginning of the rendering process, even before creating any of the rendering pipelines, which means those are sort of baked textures that kept in memory. So what does this mean?
Well, it means if the skybox for example will be moving (rotating for example) at runtime, the lighting on the character will be still the same, as the textures already baked based on specific rotation of the skybox, so if the intention is to have static skybox, then it’s okay. But if not, then there need to be resources recreation at runtime to match the skybox rotation, which is not recommended. And i believe this is doable and can be faked with pre-baking some variation of textures based on the skybox rotation (1 texture per 90 degree, 4 would be okay) and then blending between them at runtime (this is still under investigation task)!
Debugging
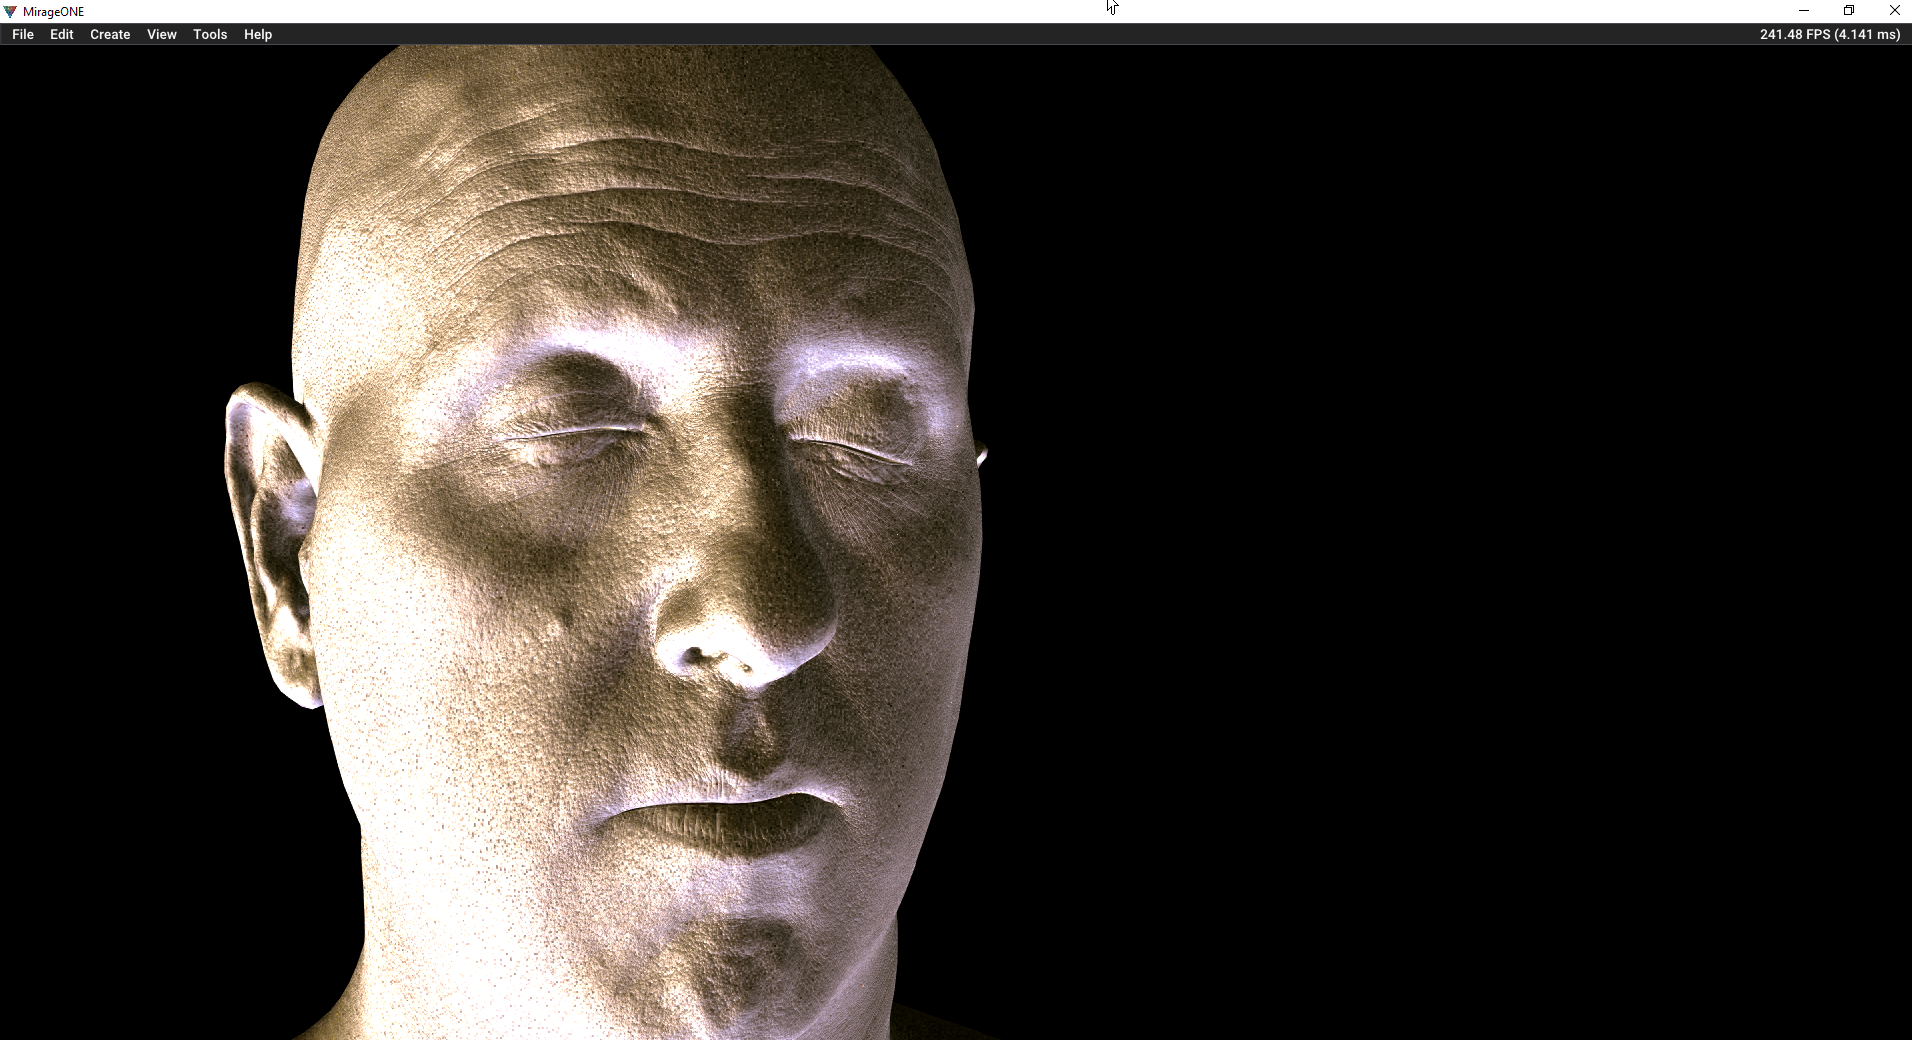
As you might have noticed, I do LOVE debugging modes (aka viewmodes, aka visualize modes) , so I’ve added a view mode for the cubemap irradiance contribution, which was very useful during the entire process of PBR integration. For example, this is to see how the irradiance contribute to lighting the model in PBR, only without the irradiance generation (or to be more specific, without blurry irradiance!)
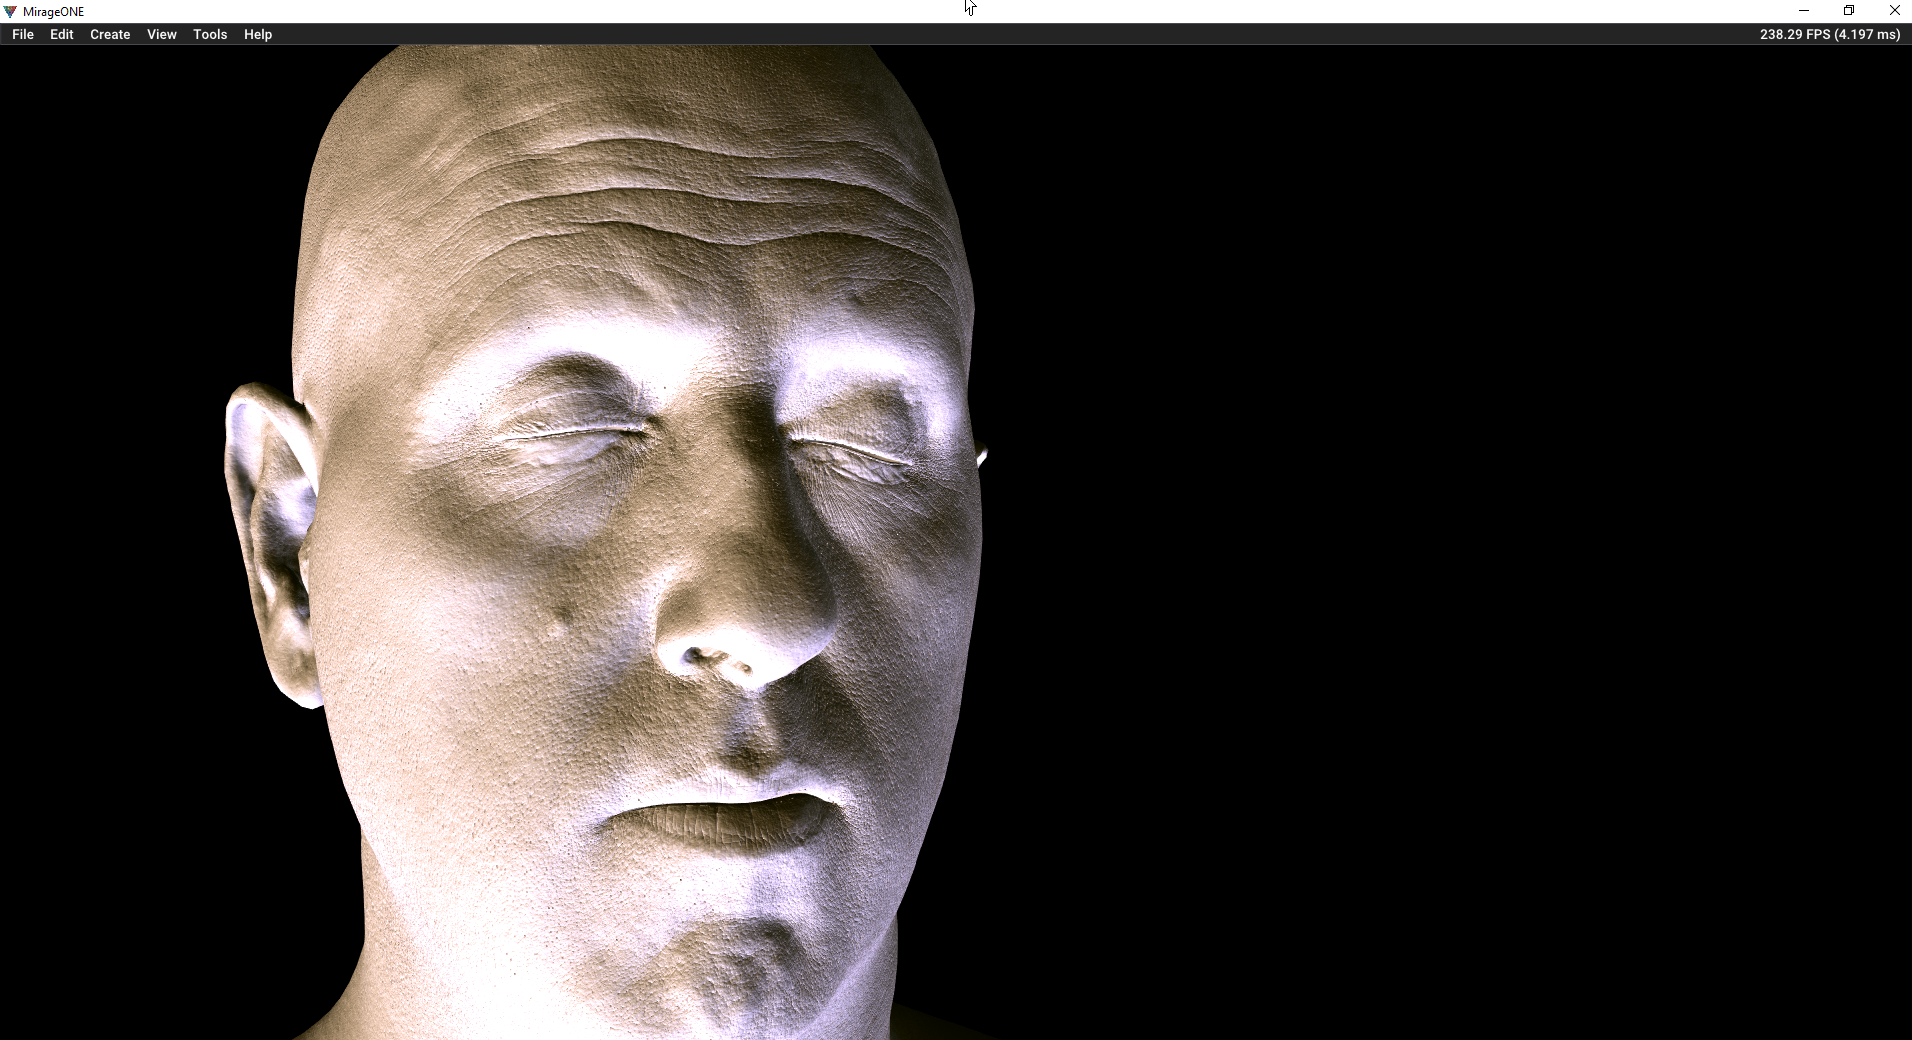
And here how it looks when the irradiance correctly generated.
The difference is in the amount of details, where in the first image each pixel of the mesh might get a super different color than it’s neighbor, in the second we relying on the blurry version of the cubemap, which makes each pixel transition smoothly in the color with its neighbors. And if you can’t really tell the difference, then here a closer look with the Comperator tool.
And regarding the final composed image, it might look or even feel the same for the first glimpse. This is the version with the full cubemap details
And here how it looks when the irradiance correctly generated (smooth & blurry).
The difference in the final colored pass, is even more hard to find out, specially in a still image, but if you look closely you will feel some sort of grain or noise, which makes the image feel unnatural, and makes the skin texture feel…Having Scabies!
And if you can’t really tell the difference, then here a closer look with the Comperator tool.
Now let’s change the cubemap texture itself, to see how differ the irradiance contribution would be with another lighting conditions. here another screenshot, from exact same view for the exact same model, but with different cubemap texture loaded to the skybox and re-generated the PBR pipeline for the sake of update.

Super different! Fully blue model (Irradiance Contribution viewmode), because this new texture is full of blue and sky colors. And to see all together, final render + Irradiance contribution for two different cubemap textures, just for the sake of understanding how that works, behind the scenes
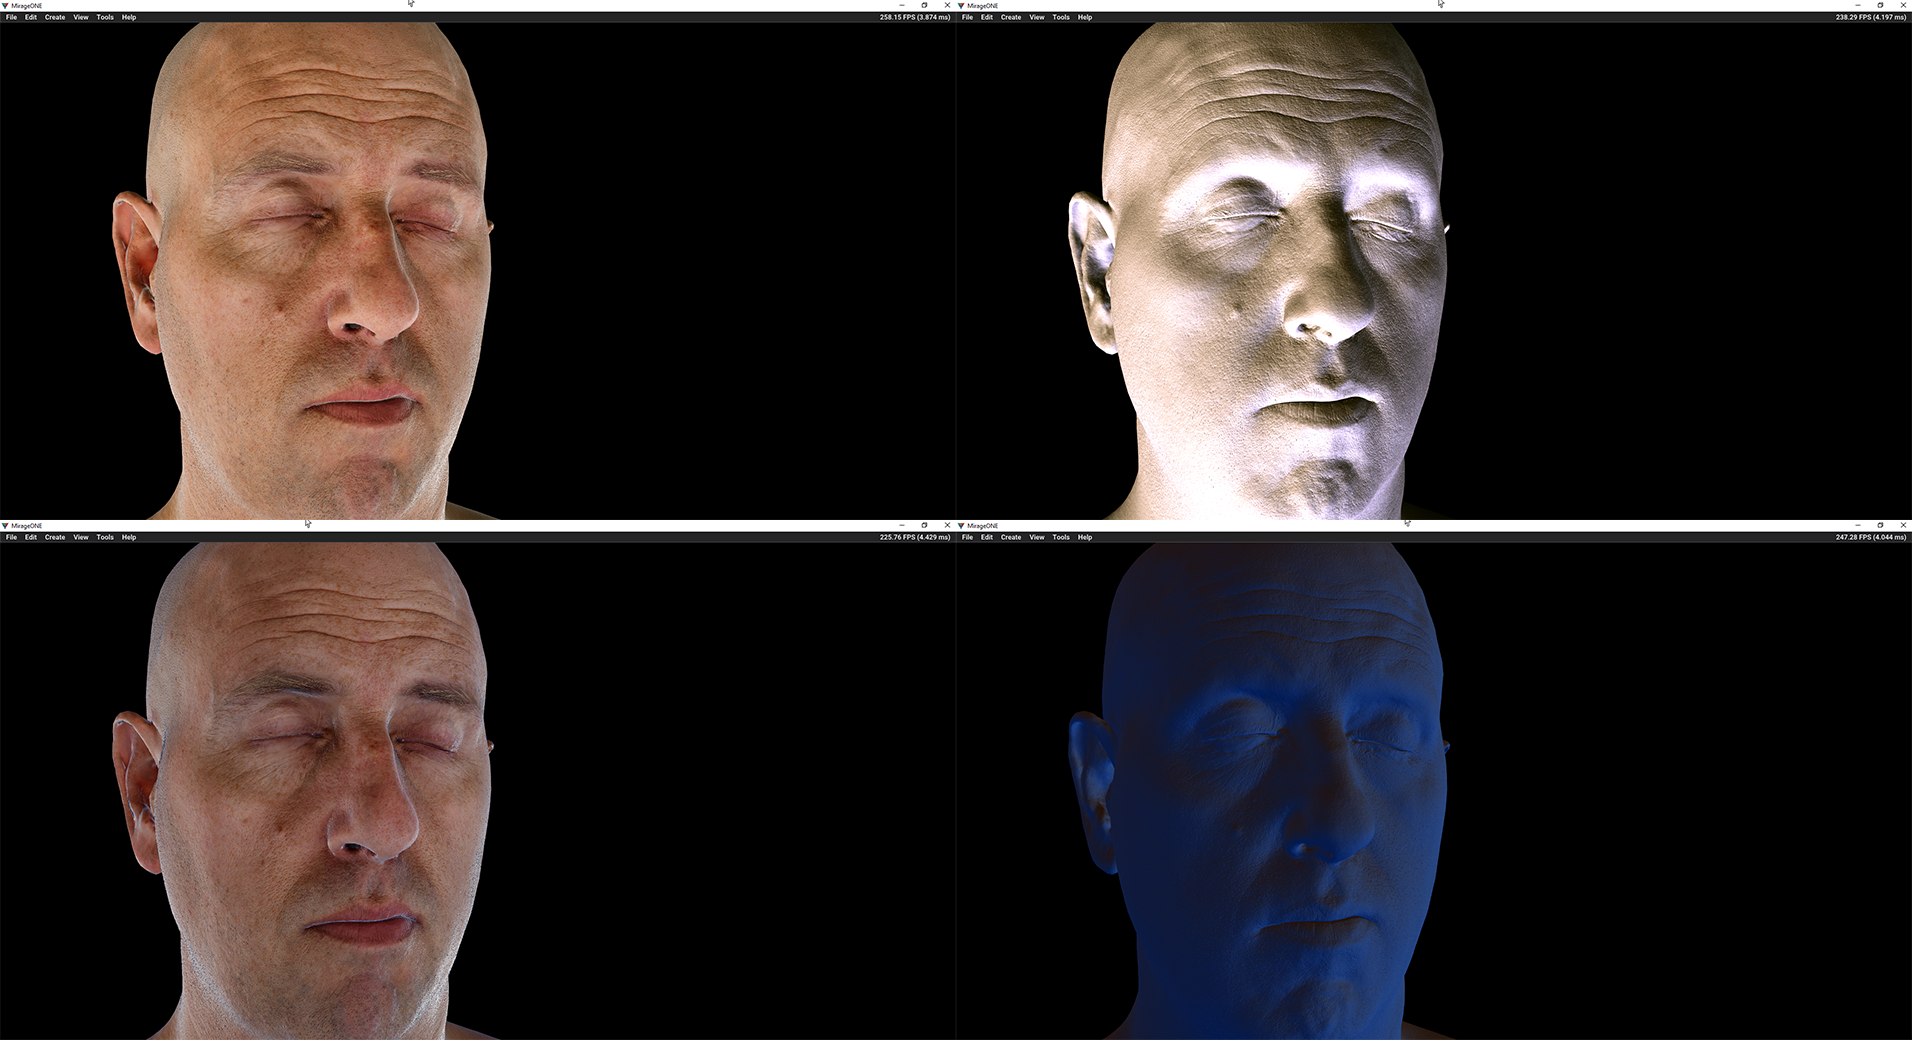
Now, to dig it further! I’ve enabled the skybox rotation, which allows me to rotate it, but as expected, the model lighting never get affected, the lighting still the same! And using the new Irradiance Contribution viewmode can allow us to see that. Which is back to what I did mention before, that generating this type of textures, happening at load time, happening once, as it’s a costly process.
Q: So, is it impossible to get the effect of a correct IBL for PBR pipeline while rotating the skybox?
A: Well, the answer for this question is actually depeneds on the case. For example, if we think about a real scenario, the skybox is almost static, and never moves, specially when it is showing some buildings, interiors and whatnot. The point is, as long as the cubemap texture not showing bluesky with clouds only, then it make zero sense to rotate it at runtim (except for testing purposes).
The other thing, it depends on the generation time for the irradiance cubemap texture. At my case it take 180.ms to generate, which might be great in terms of a process at load time, but makes not sense to update it at runtime.
At the meantime, you will notice from the video that i do add more of debugging features than actual rendering features. And this is really important for me at this early stage, as it became very helpful to find out things & understanding more behind the scenes using those magical checkboxes!
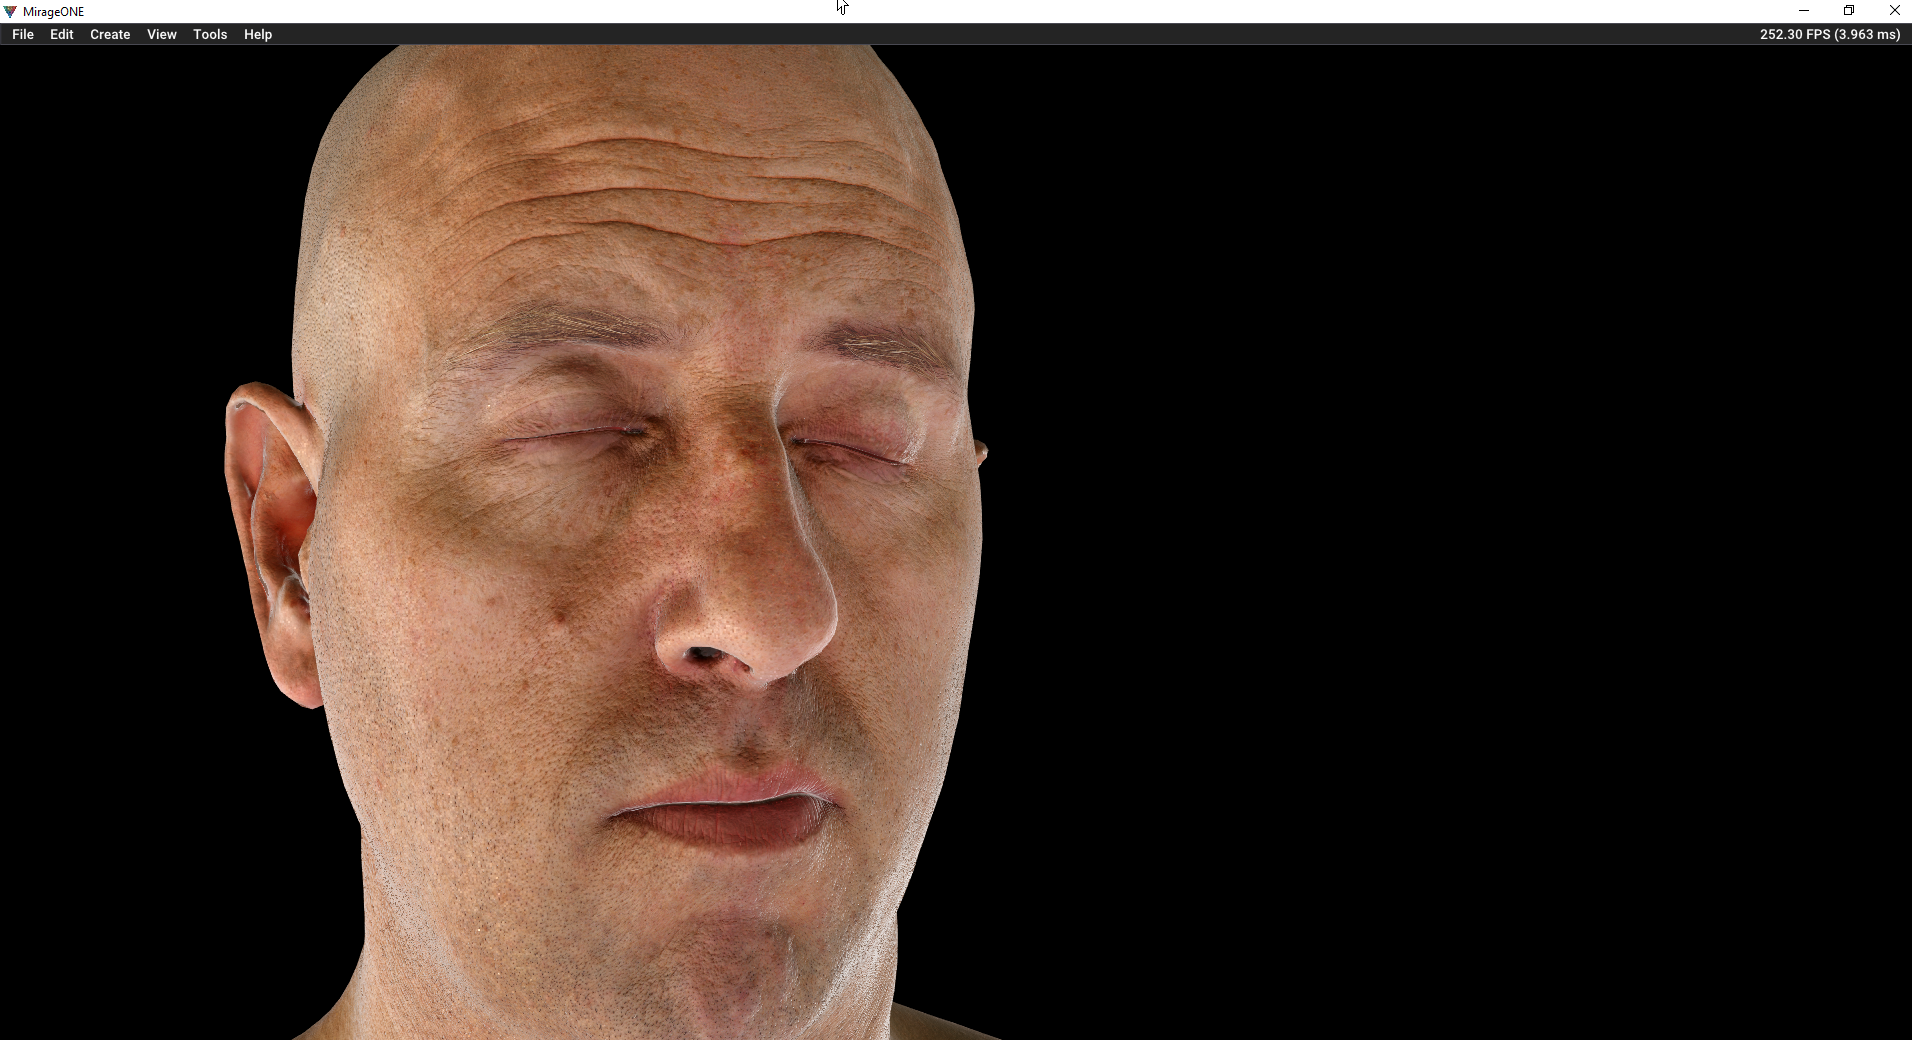
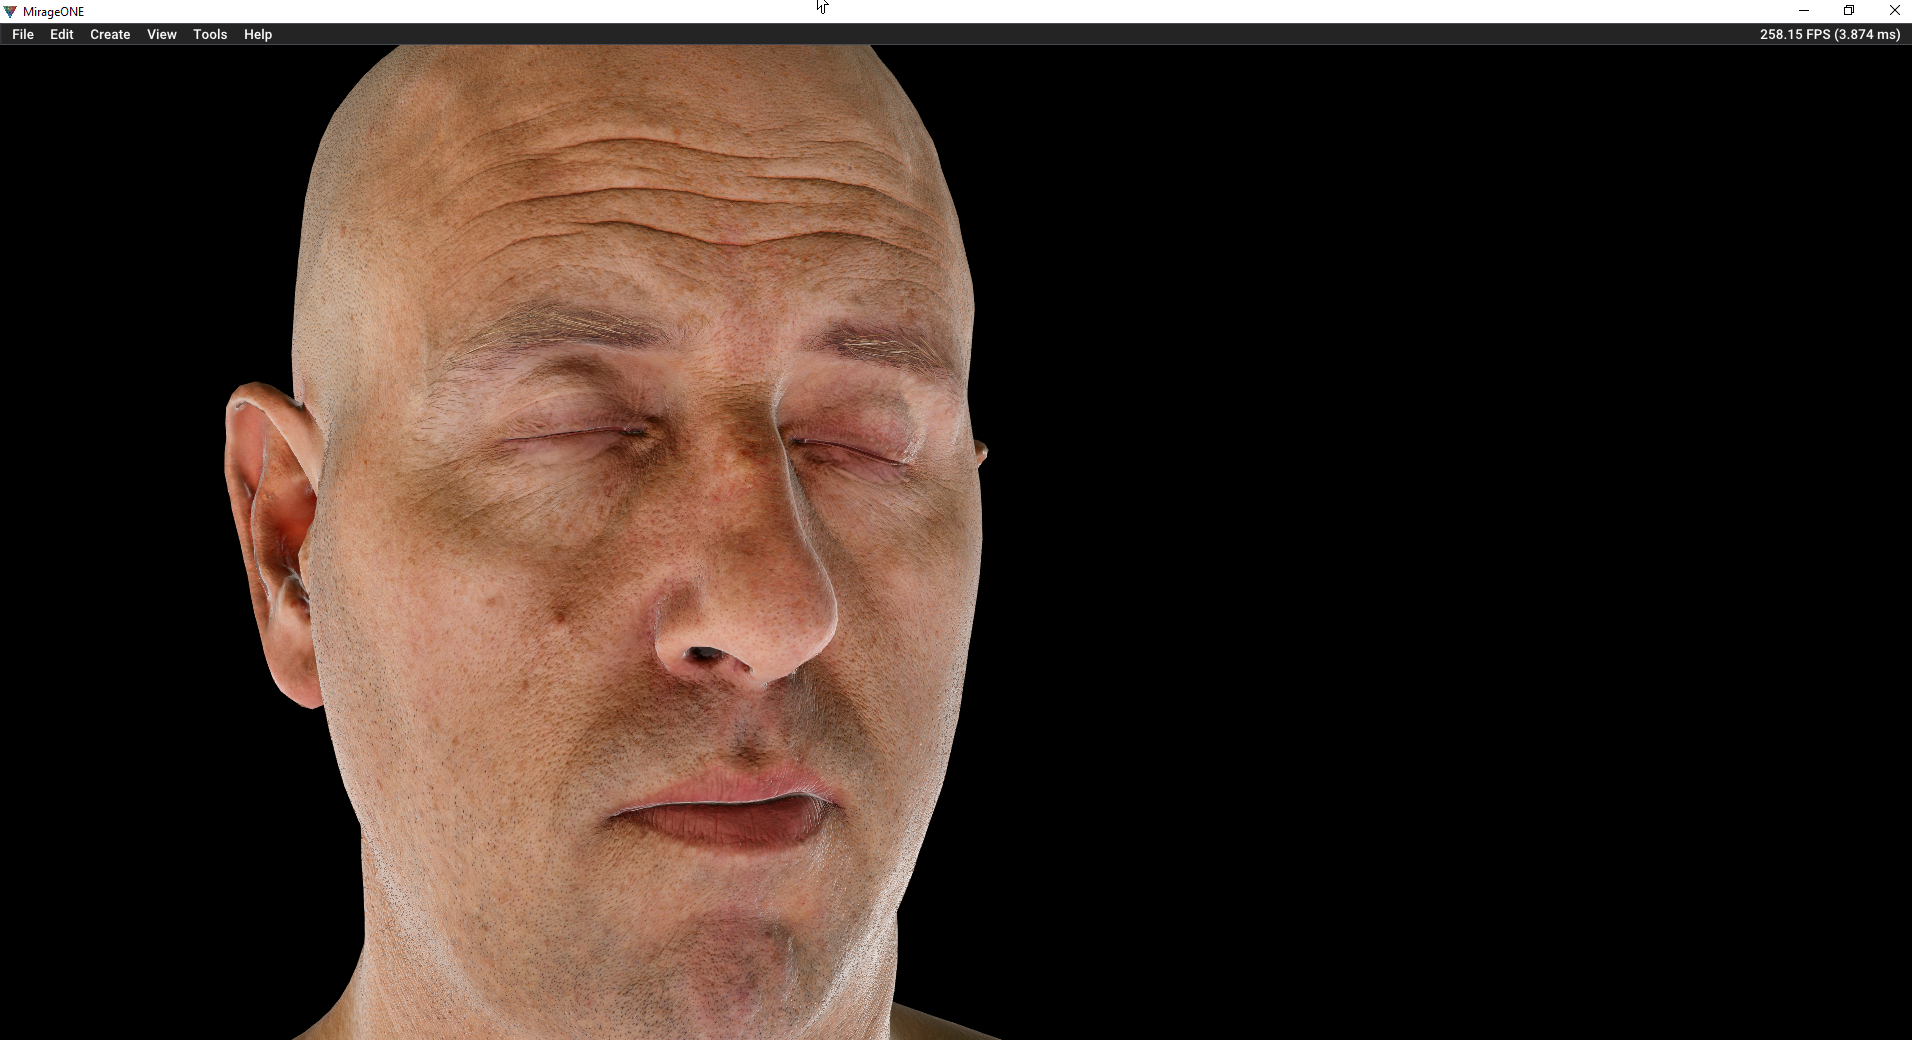
And of course, the head is from the 3DScanStore, it’s free and great item for testing! I didn’t use all the content that comes with it, and I’ve to paint some textures to fit the PBR pipeline as it is clearly it was not built for PBR!
Next related post, I may show and talk more about the animated/skinned meshes & PBR in Mirage.
-m
References:
Siggraph 2013 – Real Shading in Unreal Engine 4
Graphic Rants: Specular BRDF Reference
Wikipedia – Bidirectional reflectance distribution function
Physically Based Shading and Image Based Lighting | Trent Reed
Implementation Notes: Runtime Environment Map Filtering for Image Based Lighting | Placeholder Art
LearnOpenGL – Diffuse irradiance
LearnOpenGL – Specular IBL
Advanced WebGL – Part 3: Irradiance Environment Map – Codeflow
Coding Labs :: Physically Based Rendering
Analytical DFG Term for IBL | Krzysztof Narkowicz


