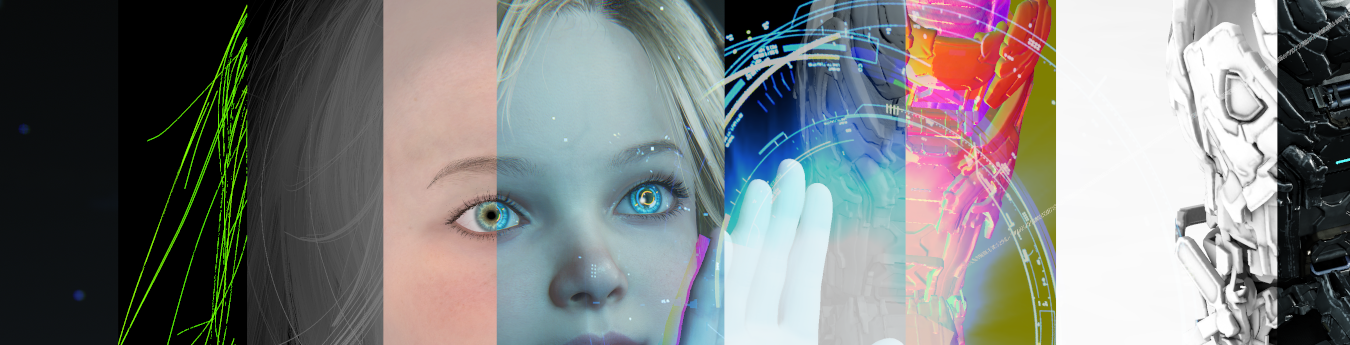
Behind the Pretty Frames: PRAGMATA
- Introduction
- Configs
- Behind the Frame
- D3D12
- Compute
- Blue Noise
- PRAGMATA Vertex
- Frame
- Compute Stuff Kicked
- UI Early Prepare [Not Always]
- Compute Stuff Kicked
- HiZ [Compute]
- Computes (probably culling)
- Z-Prepass
- Deferred G-buffer
- IBL/Skybox [Not Always]
- Histogram Adjustment [Compute] [Not always]
- SSAO [Compute]
- Shadowmap
- Shadowmap Shrinking [Compute]
- Lighting
- Ray Tracing
- Hair (Strand Based) [Compute]
- Early Particles
- Lens Flare Image [Not Always]
- Late Particles
- Post Processing
- UI Prepare [Not Always]
- UI [Not Always]
- Present
- Life of a Frame [Rendering Graph]
- Extra Stuff for Future Investigation
- Engine General Observations
- A …Thought
- Epilogue
- Related Readings & Videos
Introduction
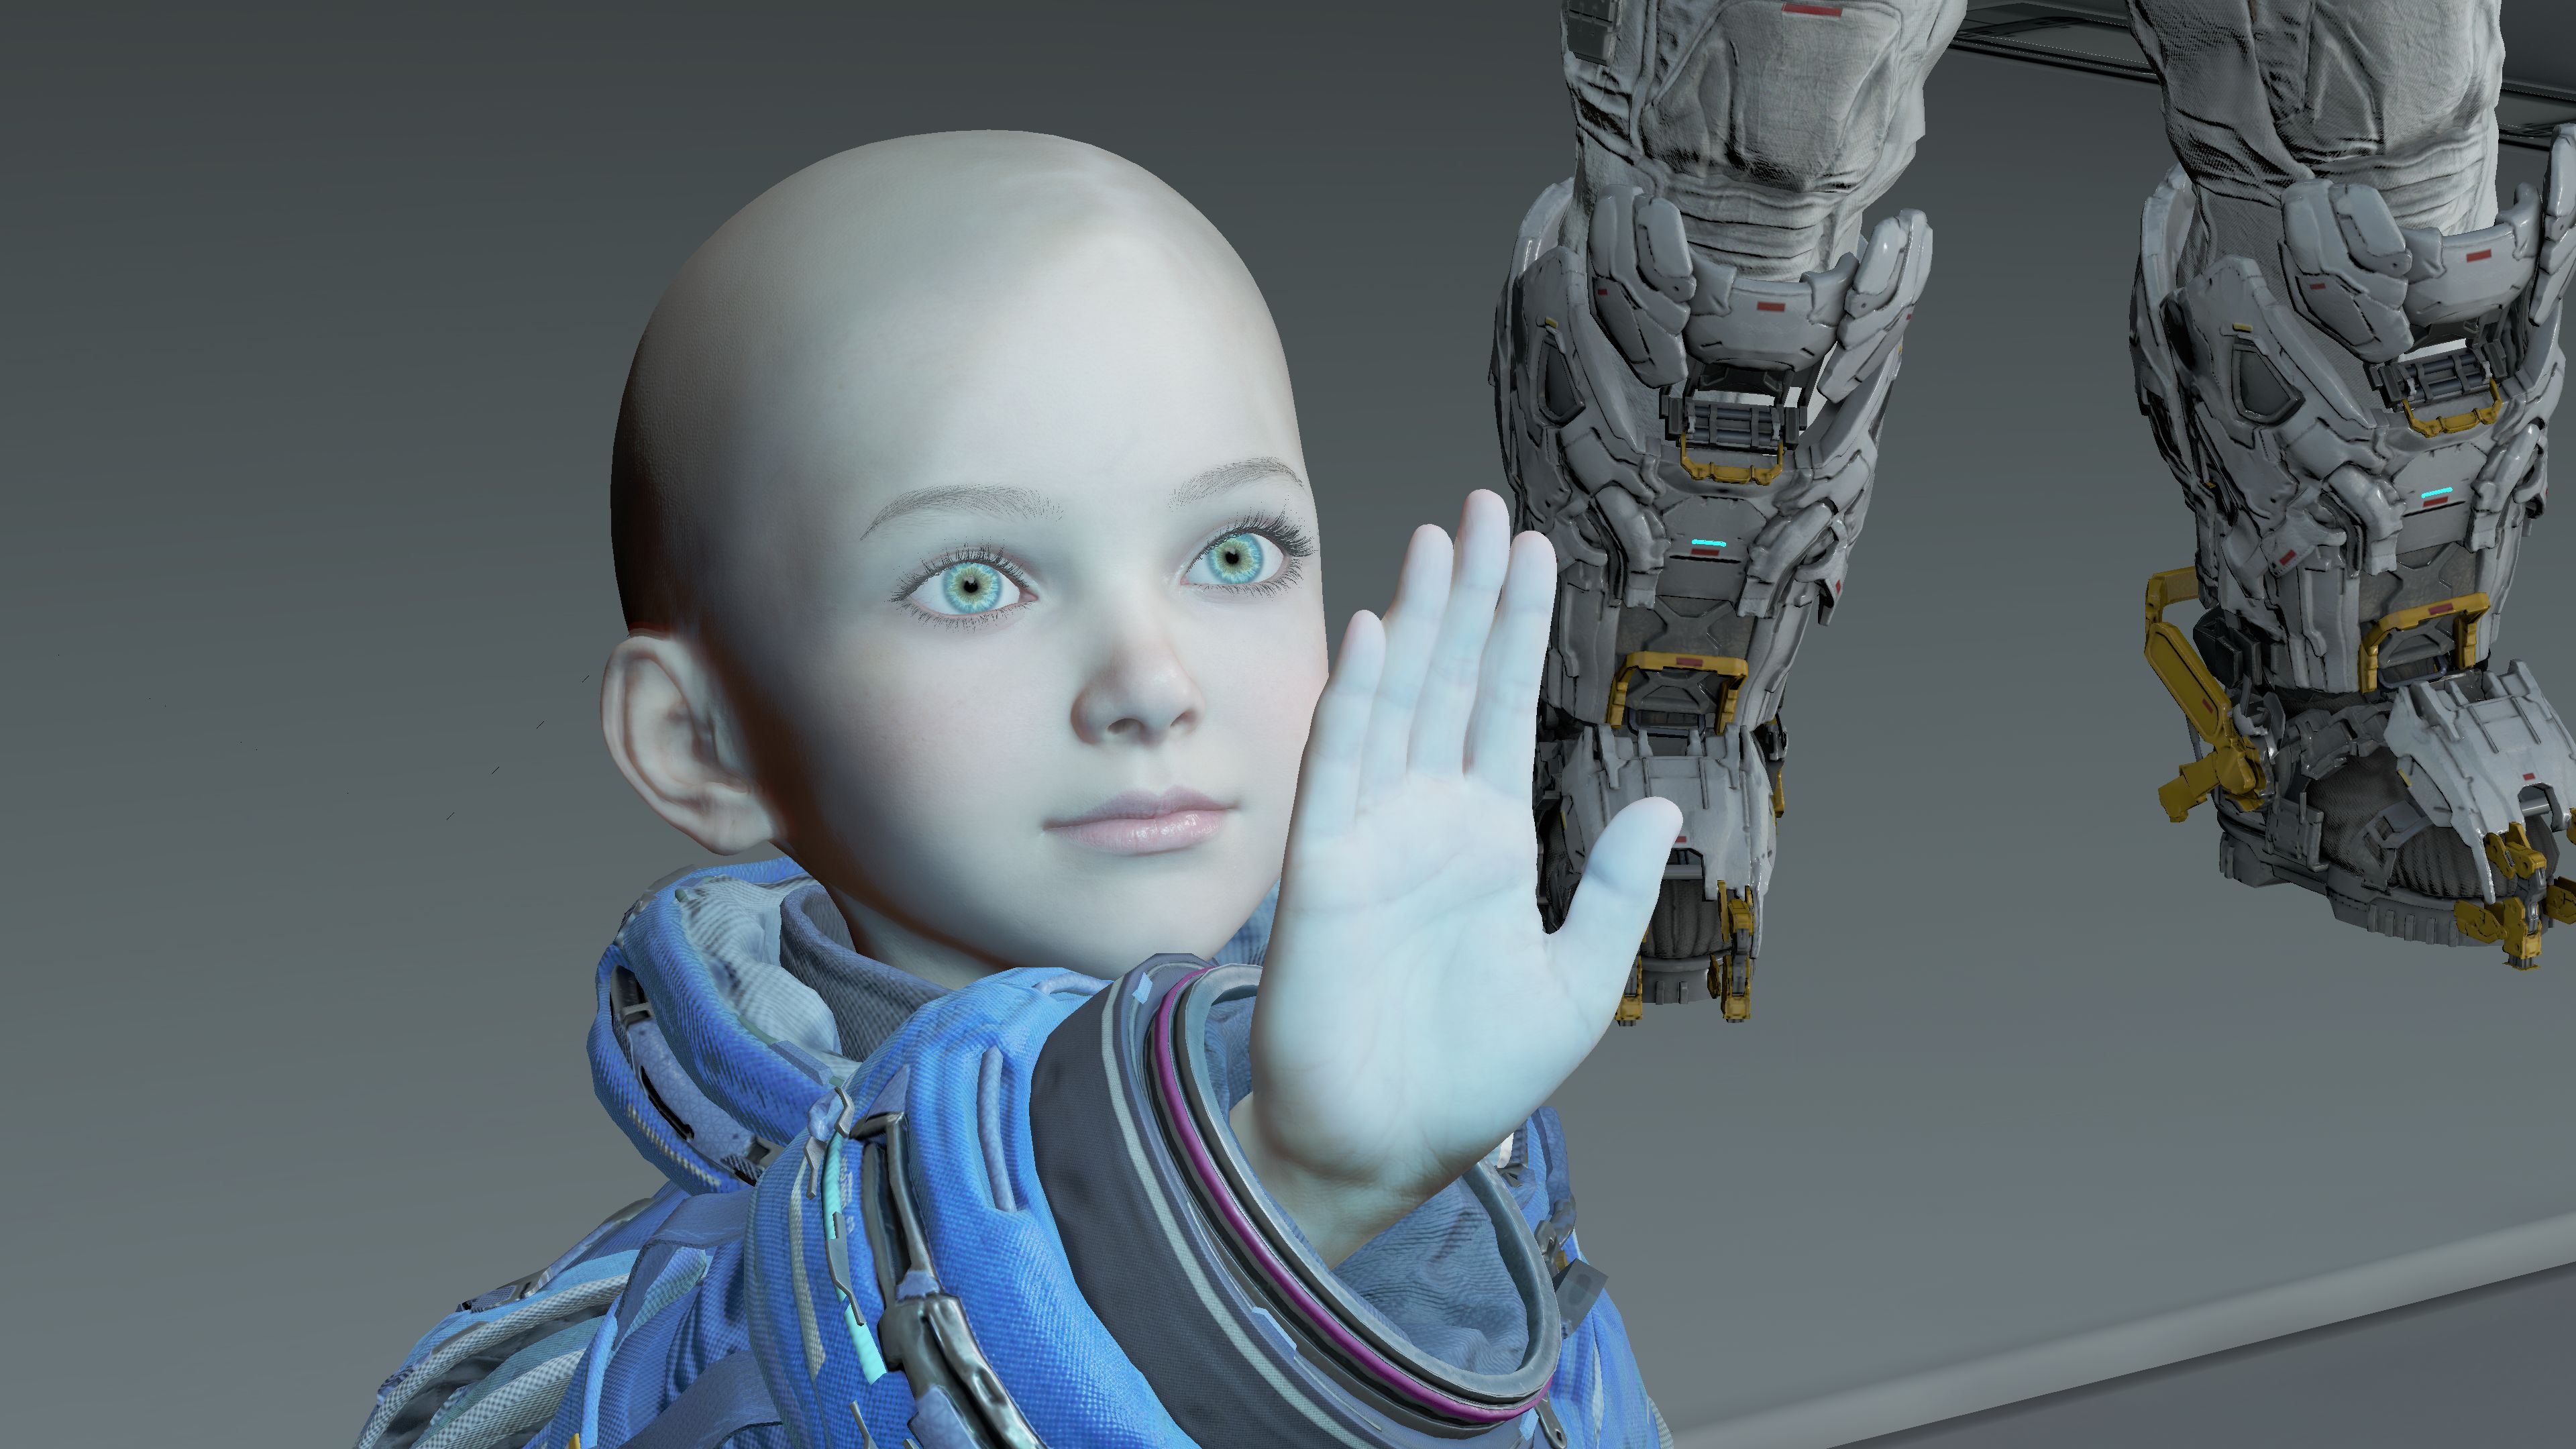
The moment Capcom showed their new IP years ago, i kinda fall in love of it before even learning anything about the gameplay—which is a whole different thing to be fair!
The idea of having a little kinda weak character co-operating with a larger kinda powerful-yet-limited one, and both making their way together in a strange world, is something i can relate to very quickly. In case you never visited my about page, one of my all time favorites —and one of the few games i didn’t care about wasting my money on buying its collector’s editor— is the masterpiece The Last Guardian, this game has a very strange magic, coming from Ico, it tops everything been in Ico and/or Shadow of the Colossus. These 3 games, are very underrated regardless how much credit they get!
Now fast forward…
And fast forward few more years, and pass some delays…
The demo released on Steam, the moment i got the email notification from Steam, i though it was the game released, shortly i knew that it is just a demo, but anyways it is better than nothing. So, i installed it on Steam Deck, and went through my first play thought the demo. And i was hooked from the first hack execution!
Fast forward again, and few weeks ago the final trailer for the game dropped, and by playing the demo and watching the new trailer, you can tell that for the past 5 years or so, the team has been cooking so hard! You can easily spot the huge boost in overall quality and specially the hair tech and characters, cloth & hard surface rendering,… i won’t hesitate to doubt that the team did an overhaul of Diana’s model or her head at least!
Now tell me, how come it is a Capcom game, a new IP, it has unique gameplay, a character bond matching some of my all time favorite games, built on one of the best modern game engines, a 15 minutes demo hooked me with the mechanics & sold it for me pretty well, has a very beautiful visual identity with some technical advancements & challenges, and above all it has a cute little android girl,…and you don’t expect me to celebrate that game in my own way..a frame digging for my own joy and a Behind the Pretty Frames article for knowledge share!
Configs
While i used to play the past few articles on one of my all time favorite cards, the RTX 3080, but unfortuanlty it is not the case anymore, and due to some personal reasons beyond the scope here, i had to move entirely to Ge Force RTX 5070 Ti (which i don’t like, but i had to), Ryzen 9 9950X and 64G RAM.
i pushed pretty much everything in the graphics settings to the maximum available settings, played on 4k 3840*2160 (UHD-1), no HDR, and shut off pretty much every visual joy ruining feature, that includes but not limited to Upscaling, Dynamic Resolution, Frame Generation and Reflex.

Once more, i still on my old habit, i do take multiple captures —despite the fact taking gpu captures from recent D3D12 shipping-config titles is quite a horrible experience— for multiple areas to cover, figure out and understand topics better, as one capture could hold more clear insight about something than another capture. Also i do take multiple of captures for the same capture as the same area/view, just in case.


and i’ve got a ton of those!
Also, there are gameplay as well as Cinematic captures, and as you might’ve noticed from earlier articles, that i’m usually more biased to refer to the captures from the cinematic sequences rather than captures from actual gameplay most of the time, not for anything but because game engines usually push the bar during runtime cinematics. But i’ve got both anyways, and still both are at runtime, and both at the same engine, and both are using and having pretty similar render queues, just Cinematic shot would have some extra flavors enabled.
If something was not runtime rendering, and it was a pre-rendered video, i’ll leave a note about that.
Behind the Frame
This game is based on RE Engine, and there are some similarities between it and the Resident Evil remake (2, 3, Resistance, Village). If you did not visit this yet, i highly recommend you to do so, the frame structure has some similarities to the one we study here, and it is a great way to see the evolution of the RE Engine and how it changed in the past 4 or 5 years. Also the Resident Evil article includes a lot of tiny details that will not be mentioned here either because it is not relevant to PRAGMATA or because it is explained in there much better and no point in duplicating them here. A good example, while writing the Resident Evil article, i broke down the inner workings of every type of AO method that can be used or toggled in the graphical settings such as HBAO+, SSAO, CACAO.
General Note[s]
- All images you can click on and open the full resolution.
- i decided to got with JPG for most of the images, in order to reduce the loading & uploading time and quote, but if an image doesn’t look good or lacking details, let me know, i do have the source PNG for all of them.
- There are some targets i played a little in their color values or gamma to make them acceptable, as sometime you know how images would look like at GPU’s point of view due to the image formats, something he can see, but we can’t!
- Most of GIFs you can click them to open a YouTube video in full internal resolution (4K).
- For the very tiny image resources, If you click on the images you open the original files in new tabs, which could be as small as 1*1 pixels. But, if you right click on images and “Open image in new tab”, you will open the upscaled detailed version.
D3D12
By now you’re pretty familiar with the fact that the backbone of RE Engine on PC is D3D12, and the API has been well utilized in the past few games (i looked only in Resident Evil series). Starting from hardware raytracing, mesh shaders, a ton of compute, possibility of shading rates, indirect drawing, bindless,… and many more D3D12 specific API commands that are not commonly used.
D3D12Core 1.618.1.0
NVIDIA Driver 595.97
HLSL Shader Model 6.8
Compute
There is always an on-going movement of moving things to compute or finding an innovative ways to utilize the GPU to the maximum by moving stuff to compute. Or even some new techniques that happens to be innovated and find their way to compute right away. And RE Engine is not a stranger. Last time i checked an RE Engine game it had a good compute utilization, and the game we’re checking here today is taking this even further to some more uncharted territories for the engine. The engine has improved, things are vanishing from compute due to being redundant or not needed anymore, things such as SSR, but there are other things that came on the table since last time, like Ray Tracing, Denoising, Meshlets, Instance Culling, and Hair physics. The compute queue is quite busy in PRAGMATA pretty much all the time, and there isn’t a single step in the graphics pipeline that is not making a benefit of compute beforehand in way or another.

Here are below a list of core compute utilizations that are exists in PRAGMATA!
Compute Dispatches Queue (not in a specific order)
- Fast Clear/Copy
- Skinning
- Culling
- Instance Culling (SDF AABB tests)
- Meshlet Culling
- Occlusion Culling
- HiZ
- Cloth Simulation
- Mesh/Vertex Deformation (including Blendshapes)
- Calculate Normals
- Strand Hair Physics
- Light Probes
- Meshlet sorting
- GPU Particles
- Instancing (IDI & Draw Indirect)
- Light Culling
- Histogram Adjustment
- SSS
- Compress Depth Normal
- Shadow Occlusion / Shadow Miss / Shadow Caster Culling
- SSAO
- Shrink Shadow Map
- Volumetric Fog
- Ray Tracing (Ray payload, Hits, BVH, Denoising)
- Strand Rendering
- Motion Blur
- Radial Blur
- DOF
- CAS
- GUI Composite
Blue Noise
Blue Noise became in the past few years the little sweet thing that can be added to any technique and it helps it delivering. It is not a secret that Ray Tracing and Denoising are the most hot topics nowadays to benefit from that. Few years ago, i would barley notice a blue noise while investigating any game, but things are changing. Here are below some uses of Blue Noise in PRAGMATA.
Things that benefit from Blue Noise
- Shadows
- Volumetric Fog
- Shadow Occlusion
- SSS
- Denoising
- Ray Tracing
- Post-Processing
..and possibly other things that i forgot to take notes of!

PRAGMATA Vertex
In the past i might have criticized RE Engine for having more than needed variations of vertex descriptions, but in fact, with this iteration and while looking into the version used for PRAGMATA i’ve noticed that there were quite a few, a lot fewer than what i observed in past in the Resident Evil remakes + Village.
Below are pretty much everything i was able to spot while looking into multiple frames of multiple natures, there may be one or two slipped or i intentionally skipped such as the ones that were made of a single component.
PRAGMATA’s Vertex Description – Skinned Character Meshes (Girl Legs, Cloth, Suit, Suit Attachments,…etc.) — Most of Skinned
POSITION0	R32G32B32_FLOAT		0
NORMAL1		R8G8B8A8_SNORM		0
TANGENT2	R8G8B8A8_SNORM		4
TEXCOORD3	R16G16_FLOAT		0
INDEX6		R10G10B10A2_UINT	4
PRAGMATA’s Vertex Description – Environment mesh (Probe, Wall, Regular Particles…etc.) — Most of the Static Scene
POSITION0	R32G32B32_FLOAT		0
NORMAL1		R8G8B8A8_SNORM		0
TANGENT2	R8G8B8A8_SNORM		4
TEXCOORD3	R16G16_FLOAT		0
PRAGMATA’s Vertex Description – Special Particles (Polygon 3D Cutout particle, Billboard 3D Particle,…etc.)
GENERIC0	R32_UINT		0
POSITION1	R32G32B32_FLOAT		4
COLOR2		R8G8B8A8_UNORM		16
GENERIC3	R16G16_FLOAT		20
GENERIC4	R16G16_UINT		24
PRAGMATA’s Vertex Description – Ribbon Particles (Triangle Strips)
GENERIC0	R32_UINT		0
POSITION1	R32G32B32_FLOAT		4
COLOR2		R8G8B8A8_UNORM		16
TEXCOORD3	R16G16_FLOAT		20
GENERIC4	R16G16_UINT		24
GENERIC5	R16G16_FLOAT		28
TEXCOORD6	R16G16B16A16_FLOAT	32
GENERIC7	R16G16_UINT		40
GENERIC8	R32_UINT		44
PRAGMATA’s Vertex Description – Quad Effect (Lens Flare,…etc.)
POSITION0	R32G32B32A32_FLOAT	0
COLOR1		R8G8B8A8_UNORM		16
TEXCOORD2	R16G16_FLOAT		20
GENERIC3	R16G16B16A16_FLOAT	24
GENERIC4	R16G16B16A16_FLOAT	32
PRAGMATA’s Vertex Description – UI Element 1
POSITION0	R32G32B32_FLOAT		0
COLOR1		R8G8B8A8_UNORM		12
TEXCOORD2	R16G16_FLOAT		16
TEXCOORD3	R16G16_FLOAT		20
PRAGMATA’s Vertex Description – UI Element 2
POSITION0	R32G32B32_FLOAT		0
COLOR1		R8G8B8A8_UNORM		12
TEXCOORD2	R16G16_FLOAT		16
Frame
Compute Stuff Kicked
Many compute dispatches kickstarting, things such as Cloth Simulation, Skinning (Pre-Transform Skinning), Hair Strand Simulation, Culling, Fast Copies, Update global Distance Fields, Calculate Normals, GPU Particle Emitters, Light Probes into 3D Texture.

Compute generated “Global SDF Texture” – 128*64*520 of R16_FLOAT
At this point, everything is 99% in a form of arrays or buffers, totally data and not that much visual friendly stuff to see or share here.
These are not everything, there ere other patch of compute stuff that kicks later shortly after the next step.
UI Early Prepare [Not Always]
This step as you’ll explore it below, takes place only during most moments of Gameplay, but it is of course absent during Cinematics..
There is not doubt that the UI in PRAGMATA is one of the best in the past few years. If you played the game/demo you probably have noticed that. The UI pipeline is quite different and full of tricks that you’ll see one by one while we’re going into the frame. But having the UI by nature of game engines as a final touch and final stone to put in the frame to complete, doesn’t mean it has always to wait to the end of the frame to be put in the right place. Nope! not in PRAGMATA!
PRAGMATA enjoying some unique visual identity for some of the UI elements, from the regular HUD to the 3D at worldspace UI elements/widgets. One of the very unique visual effects i’ve noticed in the UI is some sort of “Layers Ghosting Effect” for some core HUD compound elements. Such effect would be very costly if these compound & heavily packed UI elements get drawn multiple times to simulate the layers ghosting effect, hence the game taking quite a different approach for that. And this is the core reason behind this very early UI step in the frame lifetime.
The idea is simple, and i believe it is hand selected based on flag or something, consider this final frame

It may not be very clear, but the core elements of the experience in the HUD such as the weapons selector and health bar (well, it is always the 3 bottom HUD elements anyways), has some ghosting. It may not be very noticeable at first, but once you see it, you can’t unsee it. It looks interesting in motion. These elements (health bar & weapons selector) are made of may sub-elements such as texts and images.
Here is a closer look to these elements, hopefully you can see the layers ghosting now, at least in the left element due to the intensity of that part of the frame.


And while that entire widgets are needed to be drawn multiple times in the final frame to deliver the ghosting effect, it get drawn early (during this step) one single time in the frame and rendered indirectly into a render target,


Each of them is unique in its size in order to fit the elements composing it and the area it is going to occupy on the screen
They are done of course a tiny piece by a tiny piece,


Without this step, imaging later in the UI step, that number of draw commands multiplied 3 times!
Imagine if each of them get ghosted 3 times, this mean each need to re-draw entirely from scratch 3 times if we are not going through this early phase.
And then when the time comes to add the UI by the end of the frame and after post-processing, these 3 widgets get re-used as a single image each on a quad instead of re-drawing it entirely step by step every time it is needed.

This gif from the end of the frame, each of the bottom 3 widgets draws 3 times to simulate the layers ghosting effect..
So you can consider this step as a clever optimization for the UI system used in PRAGMATA!
And for these 3 core elements to render to their dedicated rendertargets, there are quite a few common UI atlases used (always the same atlases so far during the course of the demo)


For that purpose the below structs are used.
UI Early Prepare Structs
struct GUIConstant {
    mat4x4f guiViewMatrix;
    mat4x4f guiProjMatrix;
    mat4x4f guiWorldMat;
    float guiIntensity;
    float guiSaturation;
    float guiSoftParticleDist;
    float guiFilterParam;
    vec4f guiScreenSizeRatio;
    vec2f guiCaptureSizeRatio;
    vec2f guiDistortionOffset;
    float guiFilterMipLevel;
    float guiStencilScale;
    uint32 guiDepthTestTargetStencil;
    uint32 guiShaderCommonFlag;
    vec4f guiAdjustAddColor;
    float guiTextureSampleGradScale;
}

struct CheckerBoardInfo {
    vec2f cbr;
    float cbr_scale;
    float cbr_using;
    vec2f cbr_padding;
    float cbr_mipmapReadjustRatio;
    int32 cbr_mipmapReadjustable;
}Here is another frame, with more details in each of the widgets (progressing in the game, adding stuff to your HUD…makes sense!)


And in action..


And when get composed to the final HUD by the end of the frame..

Hope it is all clear now, let’s move on.
Compute Stuff Kicked
Some more compute stuff kicks here, such as Instance Culling, Meshlet Culling, Visibility Buffer as well as Light Culling.
Just like the previous compute patch of stuff that kicked earlier, everything here is pretty much data/buffers or arrays and nothing very visual to see/share.
HiZ [Compute]
Hieratical Z buffer. A sequence of compute dispatches to generate depth visibility buffer (depth mips) that can be used for occlusion.


Depth Visibility Buffer – 1920*1080 – R32_UINT
Computes (probably culling)
Z-Prepass
Z Pass.. nothing fancy. sometimes skinned shader used, other times “static” mesh shader used.


Bottom, Swapchain, 3840*2160, R10G10B10A2_UNORM
Deferred G-buffer
Draw the gbuffer piece by piece. For this given frame
Inputs given are things such as the Depth, Material ID or Visibility Buffer (in addition to meshes & their textures).


Output of the G-Buffer are as follow:
1.Modified G-Buffer
2.Emissive (RGB)
3.Color (RGB) + Metallic (A)
4.Normals (RG) + Roughness (B) + Misc (A)
5.VelocityXY (RG) + AO (B) + SSS Mask (A)


The AO rendertarget above looks like only showing the Blue channel content, and it is correct, i intended to put it that way as SNORM, the RG component would make it look weird, but in reality, that render target looks like as follow


And yes, hair is not yet!
Here are some examples of G-Buffer in other frames


Because the limit of 8 entries per row in the table above, i did not have a chance to put the alpha channels, which holding Metallic, Roughens and other Masks, here they’re below for the previous 5 example frames


IBL/Skybox [Not Always]
Sometimes (and there were very few times at the course of the demo) there is a skybox drawcall by the very end of the G-Buffer, always the last thing if ever existed, it contributes to the emissive rendertarget.


Middle, Emissive Out (3840*2160 – R11G11B10_FLOAT)
Bottom, Swapchain (you don’t’ see a sky most of the time in all these frames, but it may have some contribution)
To see the impact of this step, we’ve to step one step before, to see how the Emissive target looked like

Histogram Adjustment [Compute] [Not always]
Another RE Engine signature. This is for Auto Exposure purposes, the RE Engine seem to be using a Matrix or Multizone Metering. In that method exposure get prioritized for the “defined” most important parts of the frame. For that purpose a mask is used. And because of the dark mode applied to the majority of the game, you would notice that the mask is quite similar in majority of the frames (if not exactly the same one) and it would seem like a “Vignette”.


I’ll leave below in readings section some good reads about that method that explains it (and other auto exposure methods) in detail, and explaining why it works perfectly for some games. Anyways, for that purpose, params passed to the shader is as follow
Histogram Adjustment Structs
struct HistogramAdjustment {
    vec4f converter;
    float bright_rate;
    float dark_rate;
    float white_range;
    uint32 hitogramAdjustment_flags;
    float max_luminance;
    float min_luminance;
    float low_percentile;
    float high_percentile;
    float histogram_scale;
    float histogram_bias;
    vec2u threadgroup_count;
}

struct GlobalWhitePtUav {
    uint32 x;

}

struct LocalWhitePtSrv {
    uint32 x;
}SSAO [Compute]
TODO::
Shadowmap
Renders shadows in a R32_TYPELESS of the size 2048*2048*32 (array of 32 layers) .
Here are few layers of a shadowmap for a given frame.


It is not always the case that the 32 layers are full of data
Here is another example from a Cinematic frame, during cinematics there are always some fun stuff happening behind the camera, shadowmpas can still capture those! i won’t point to any, i’ll leave it for you to observer!


Shadowmap Shrinking [Compute]
A compute dispatch to shrink the sahdowmap to 1/2 (1024*1024*32)

The shrunk shadowmap is used in other effects such as volumetrics. While the actual full resolution shadowmap used for shadows.
Worth noting that there are some Shadow Occlusion Planes 3d textures 64*64*33 of the format R32_UINT that are utilized during the shadow passes. One of them would look like that

Just one layer of the array
Lighting
Deferred lighting goes as follow, this example below, all are inputs, except the last row of the table.


The Shadow Map is 2048*2048*30 where the Static Shadow Map is 512*512*128
SSS Params is based on a passed SSS Profiles data to the shader
The Diffuse is out in a step, then the Specular in a next step, then the final Lit based on both (Diffuse & Specular)
Ray Tracing
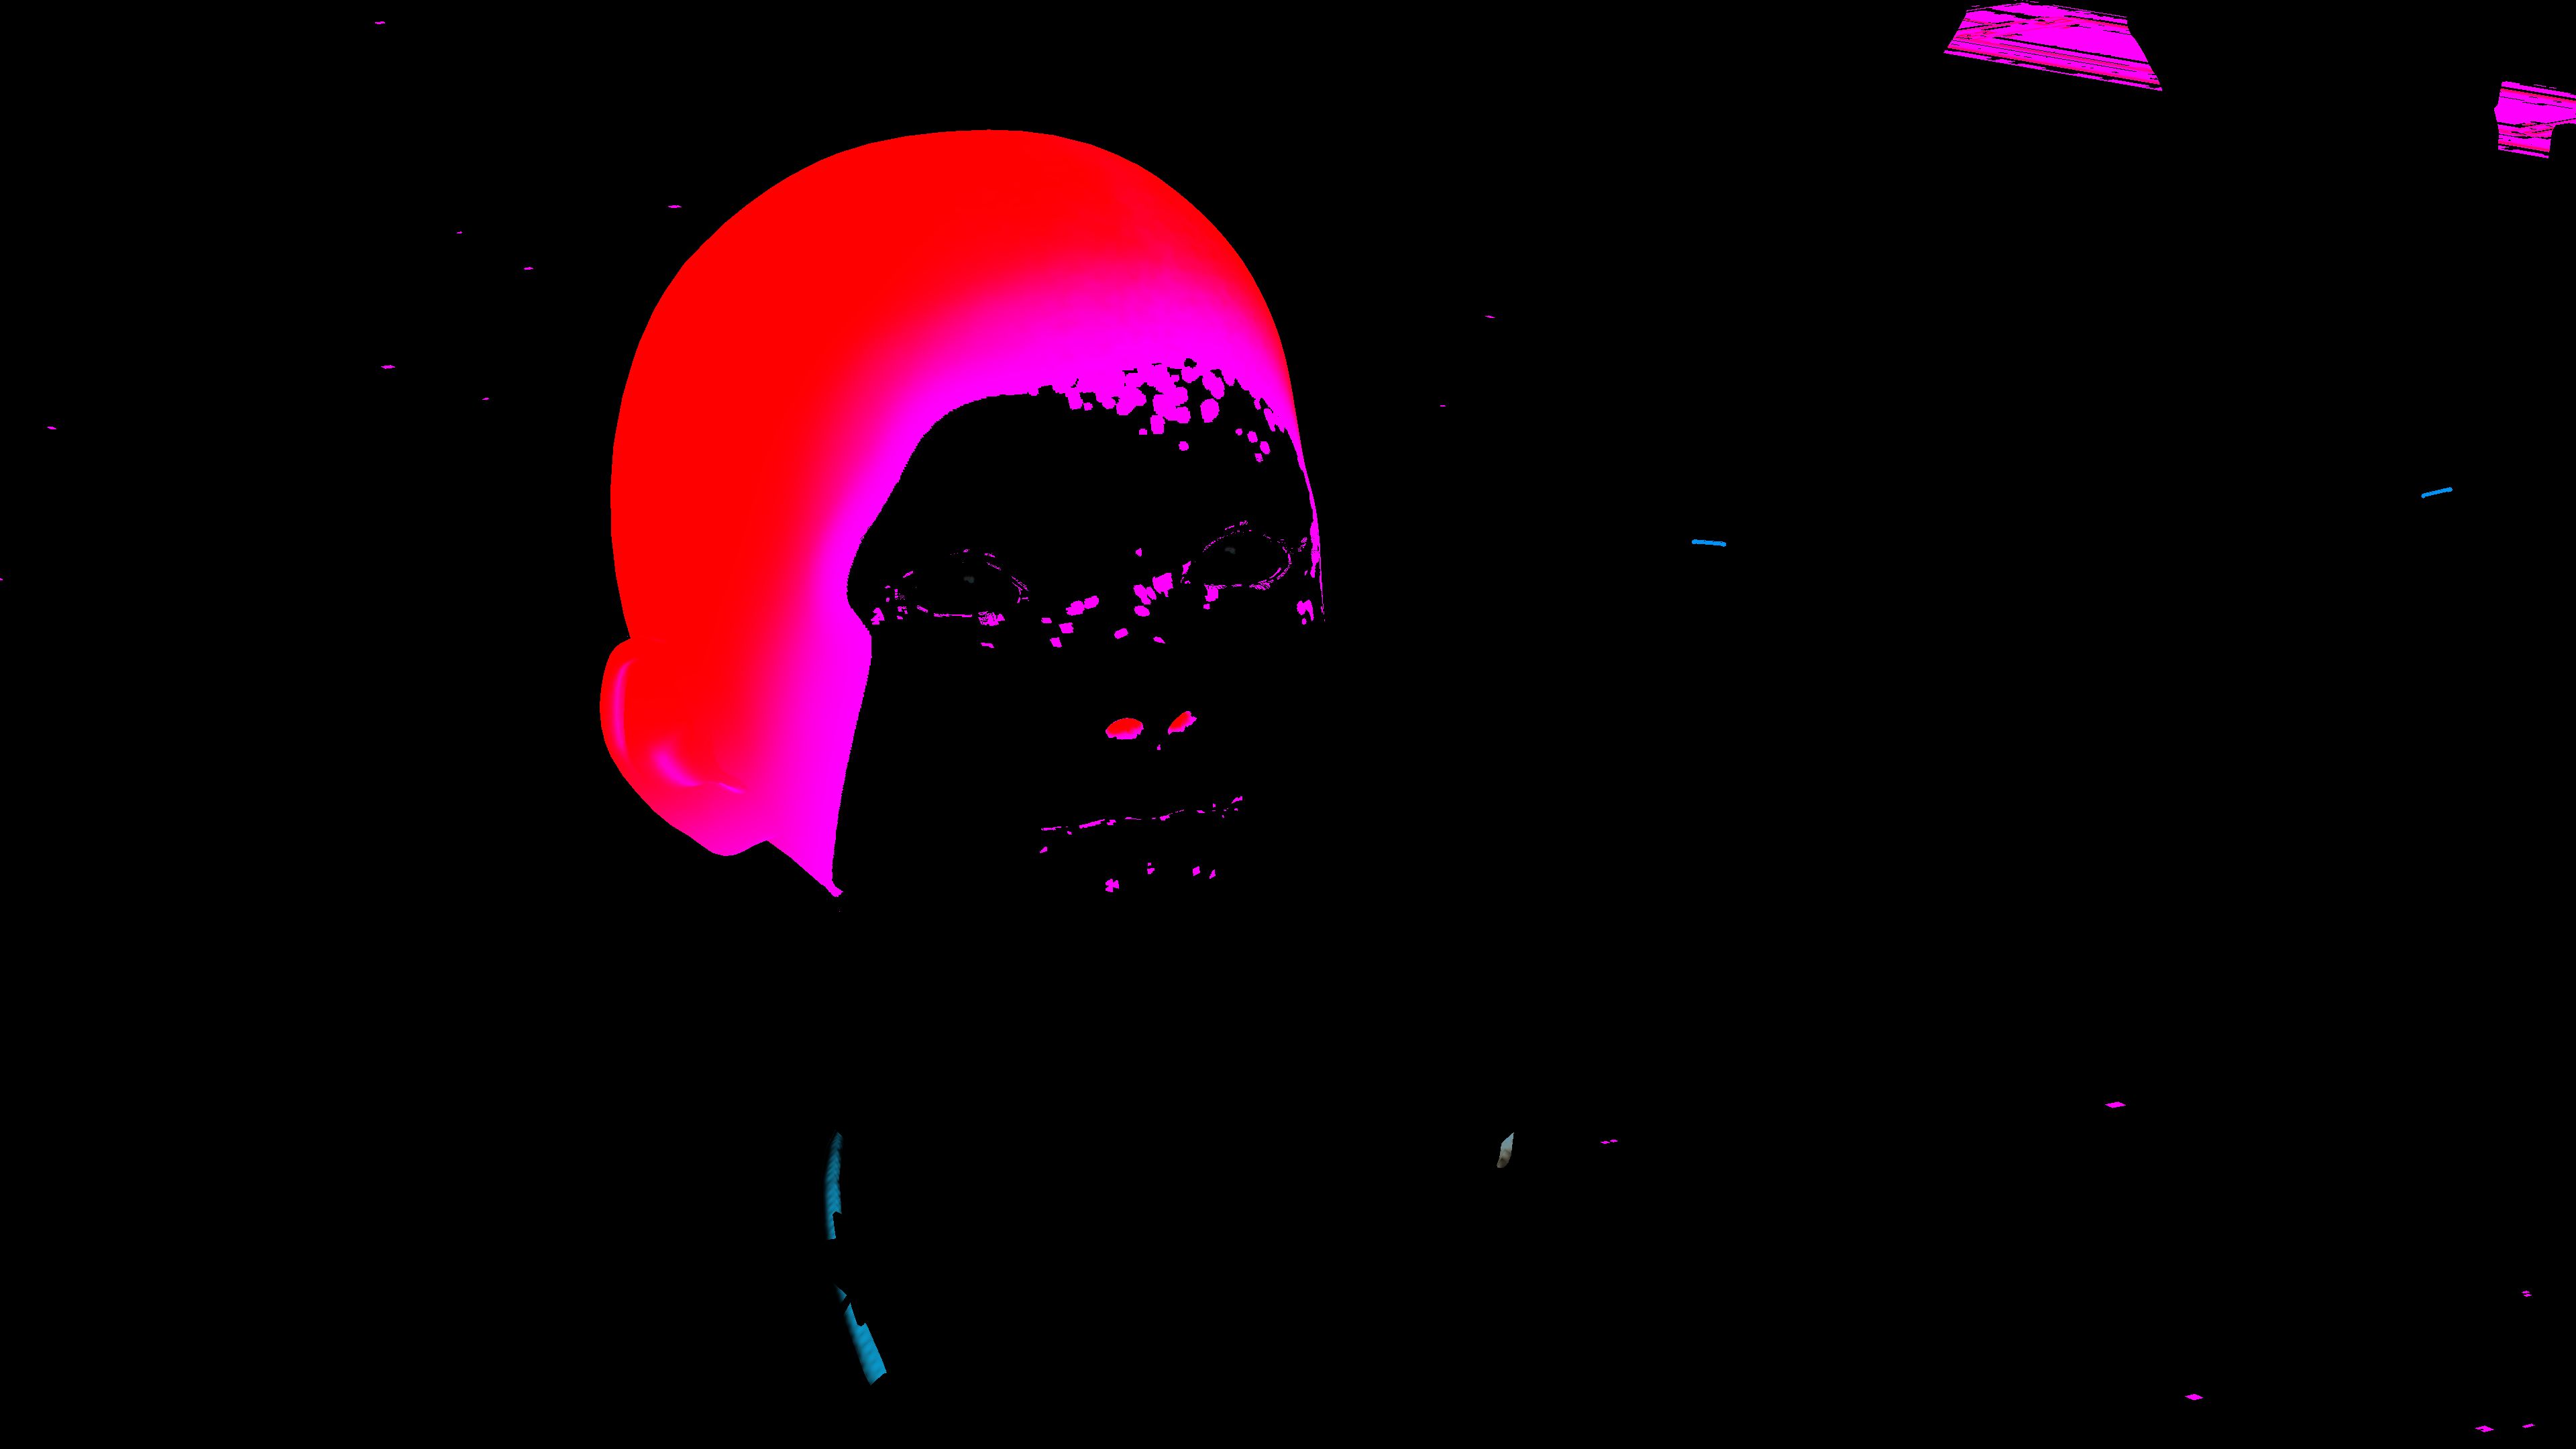
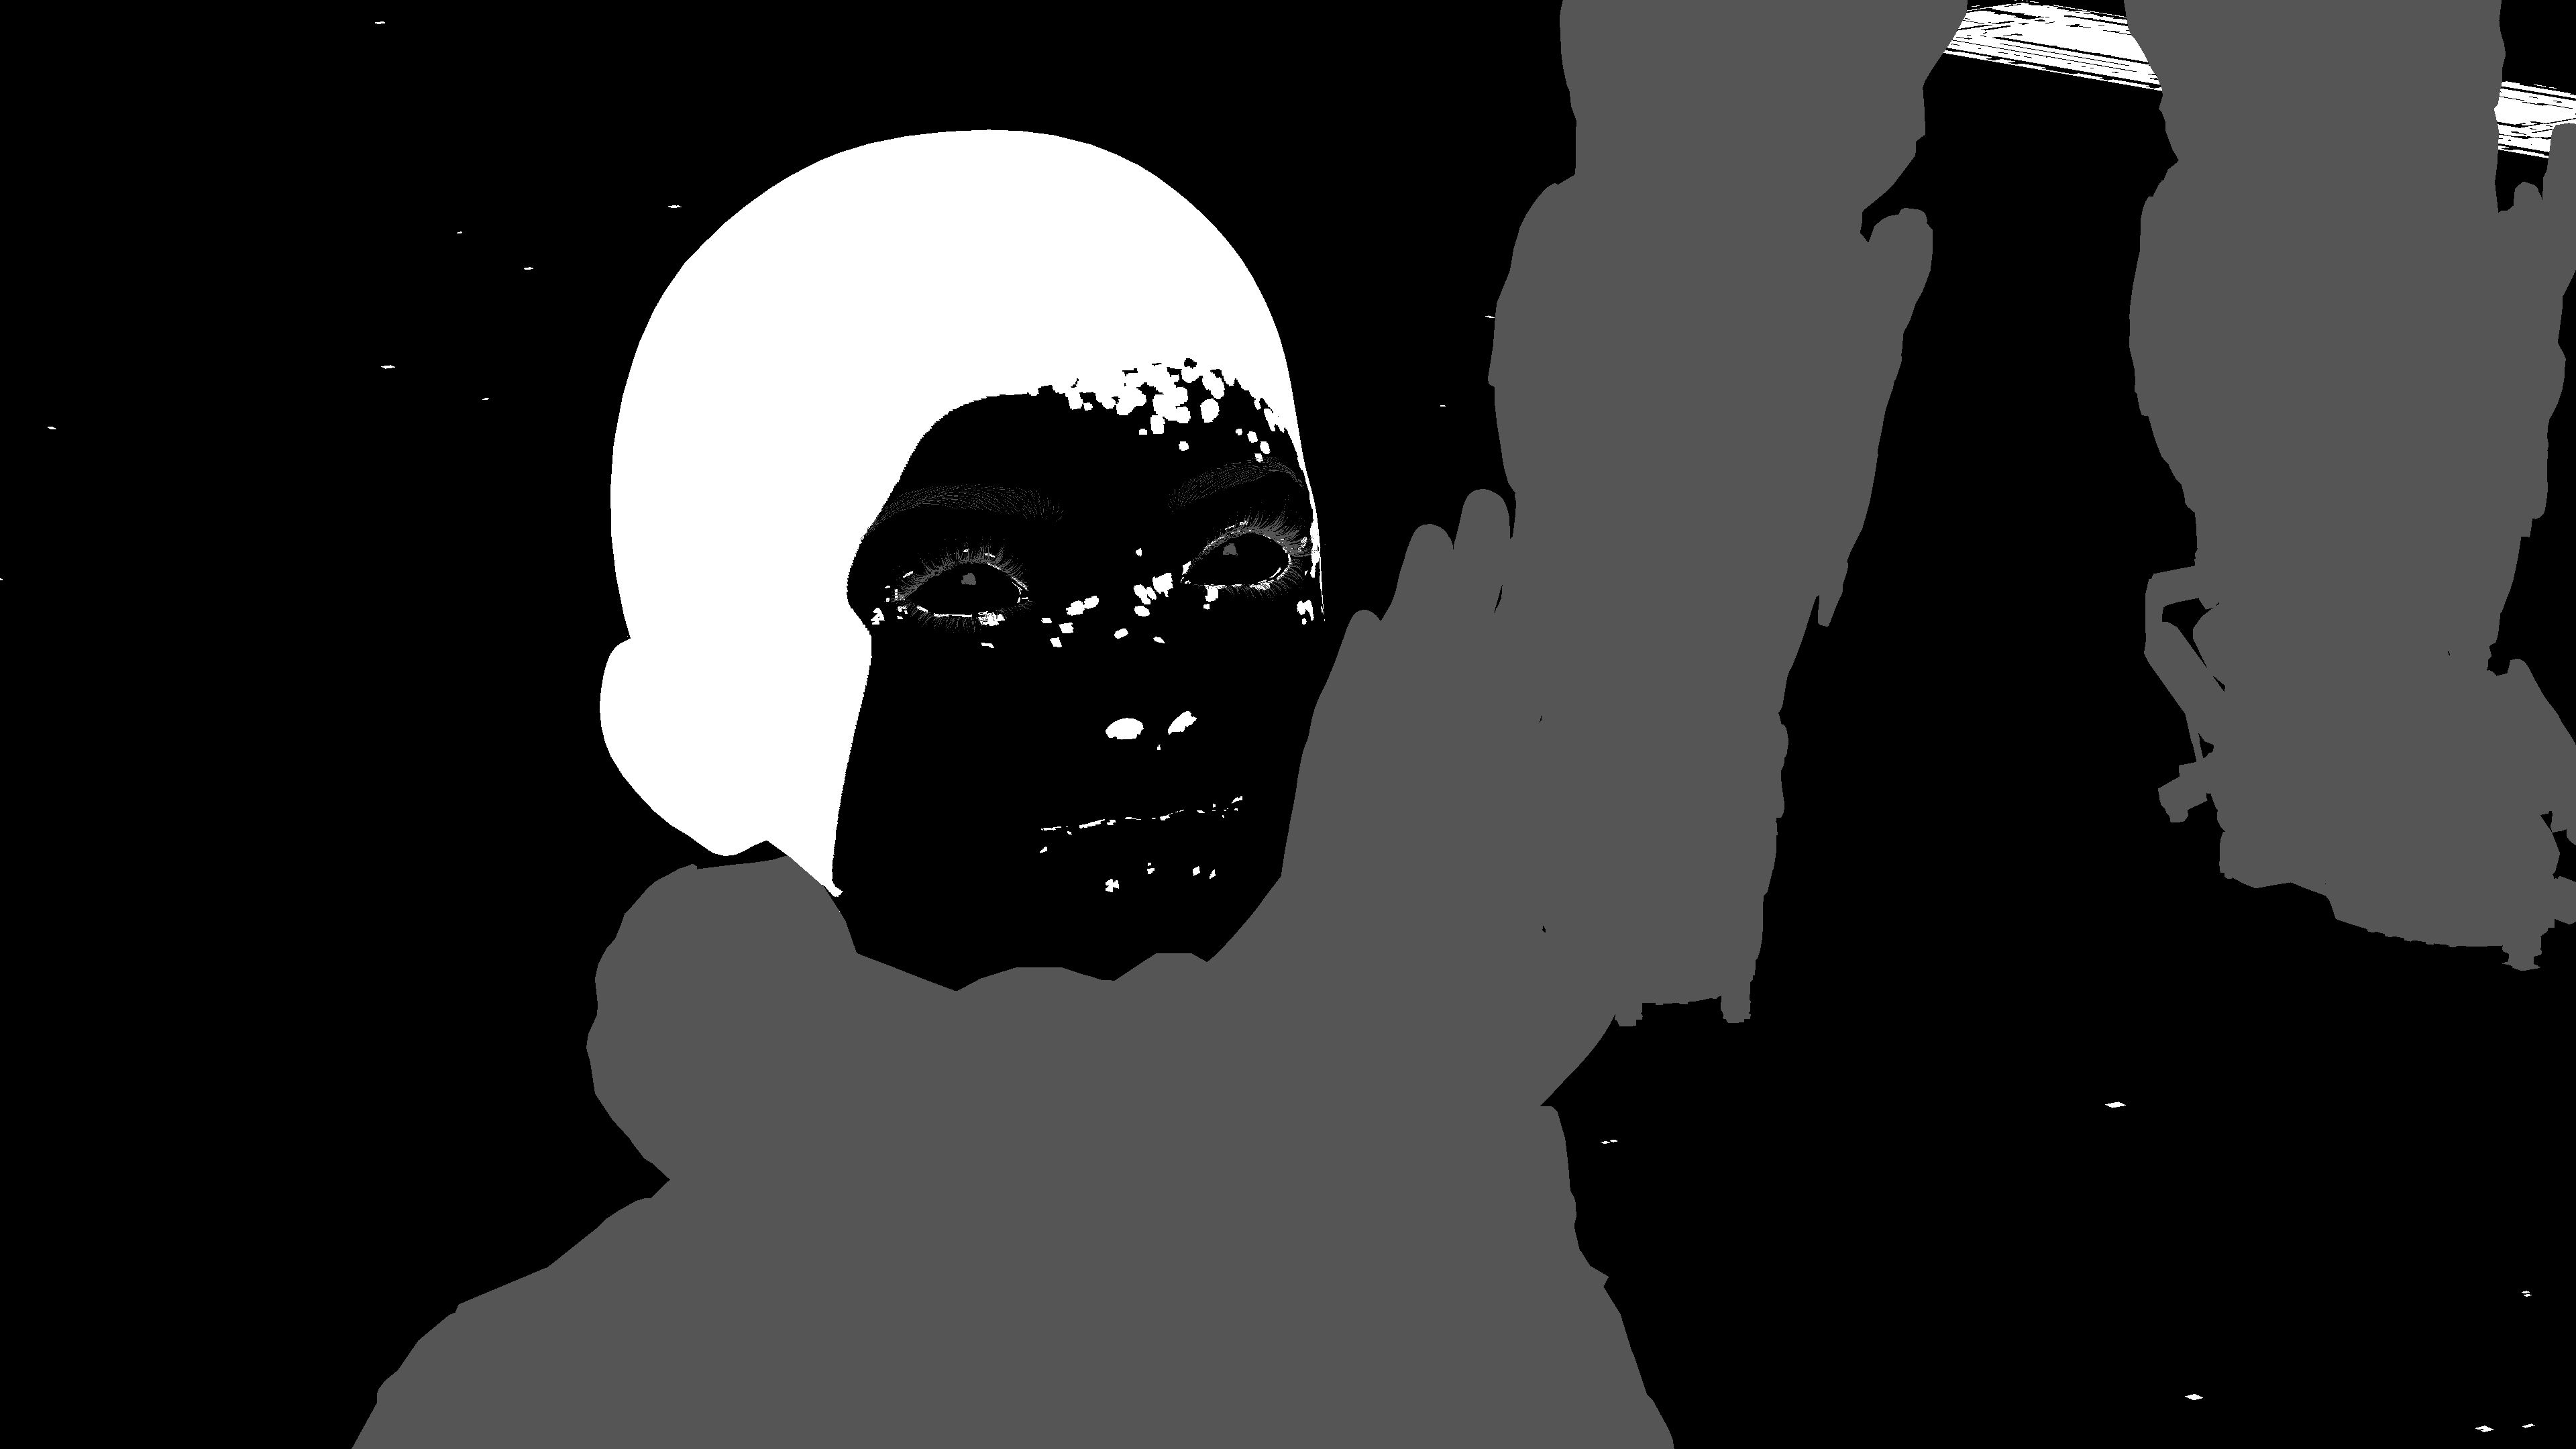
Here are couple of TLAS to sum the Ray Tracing optimizations in BVHs.


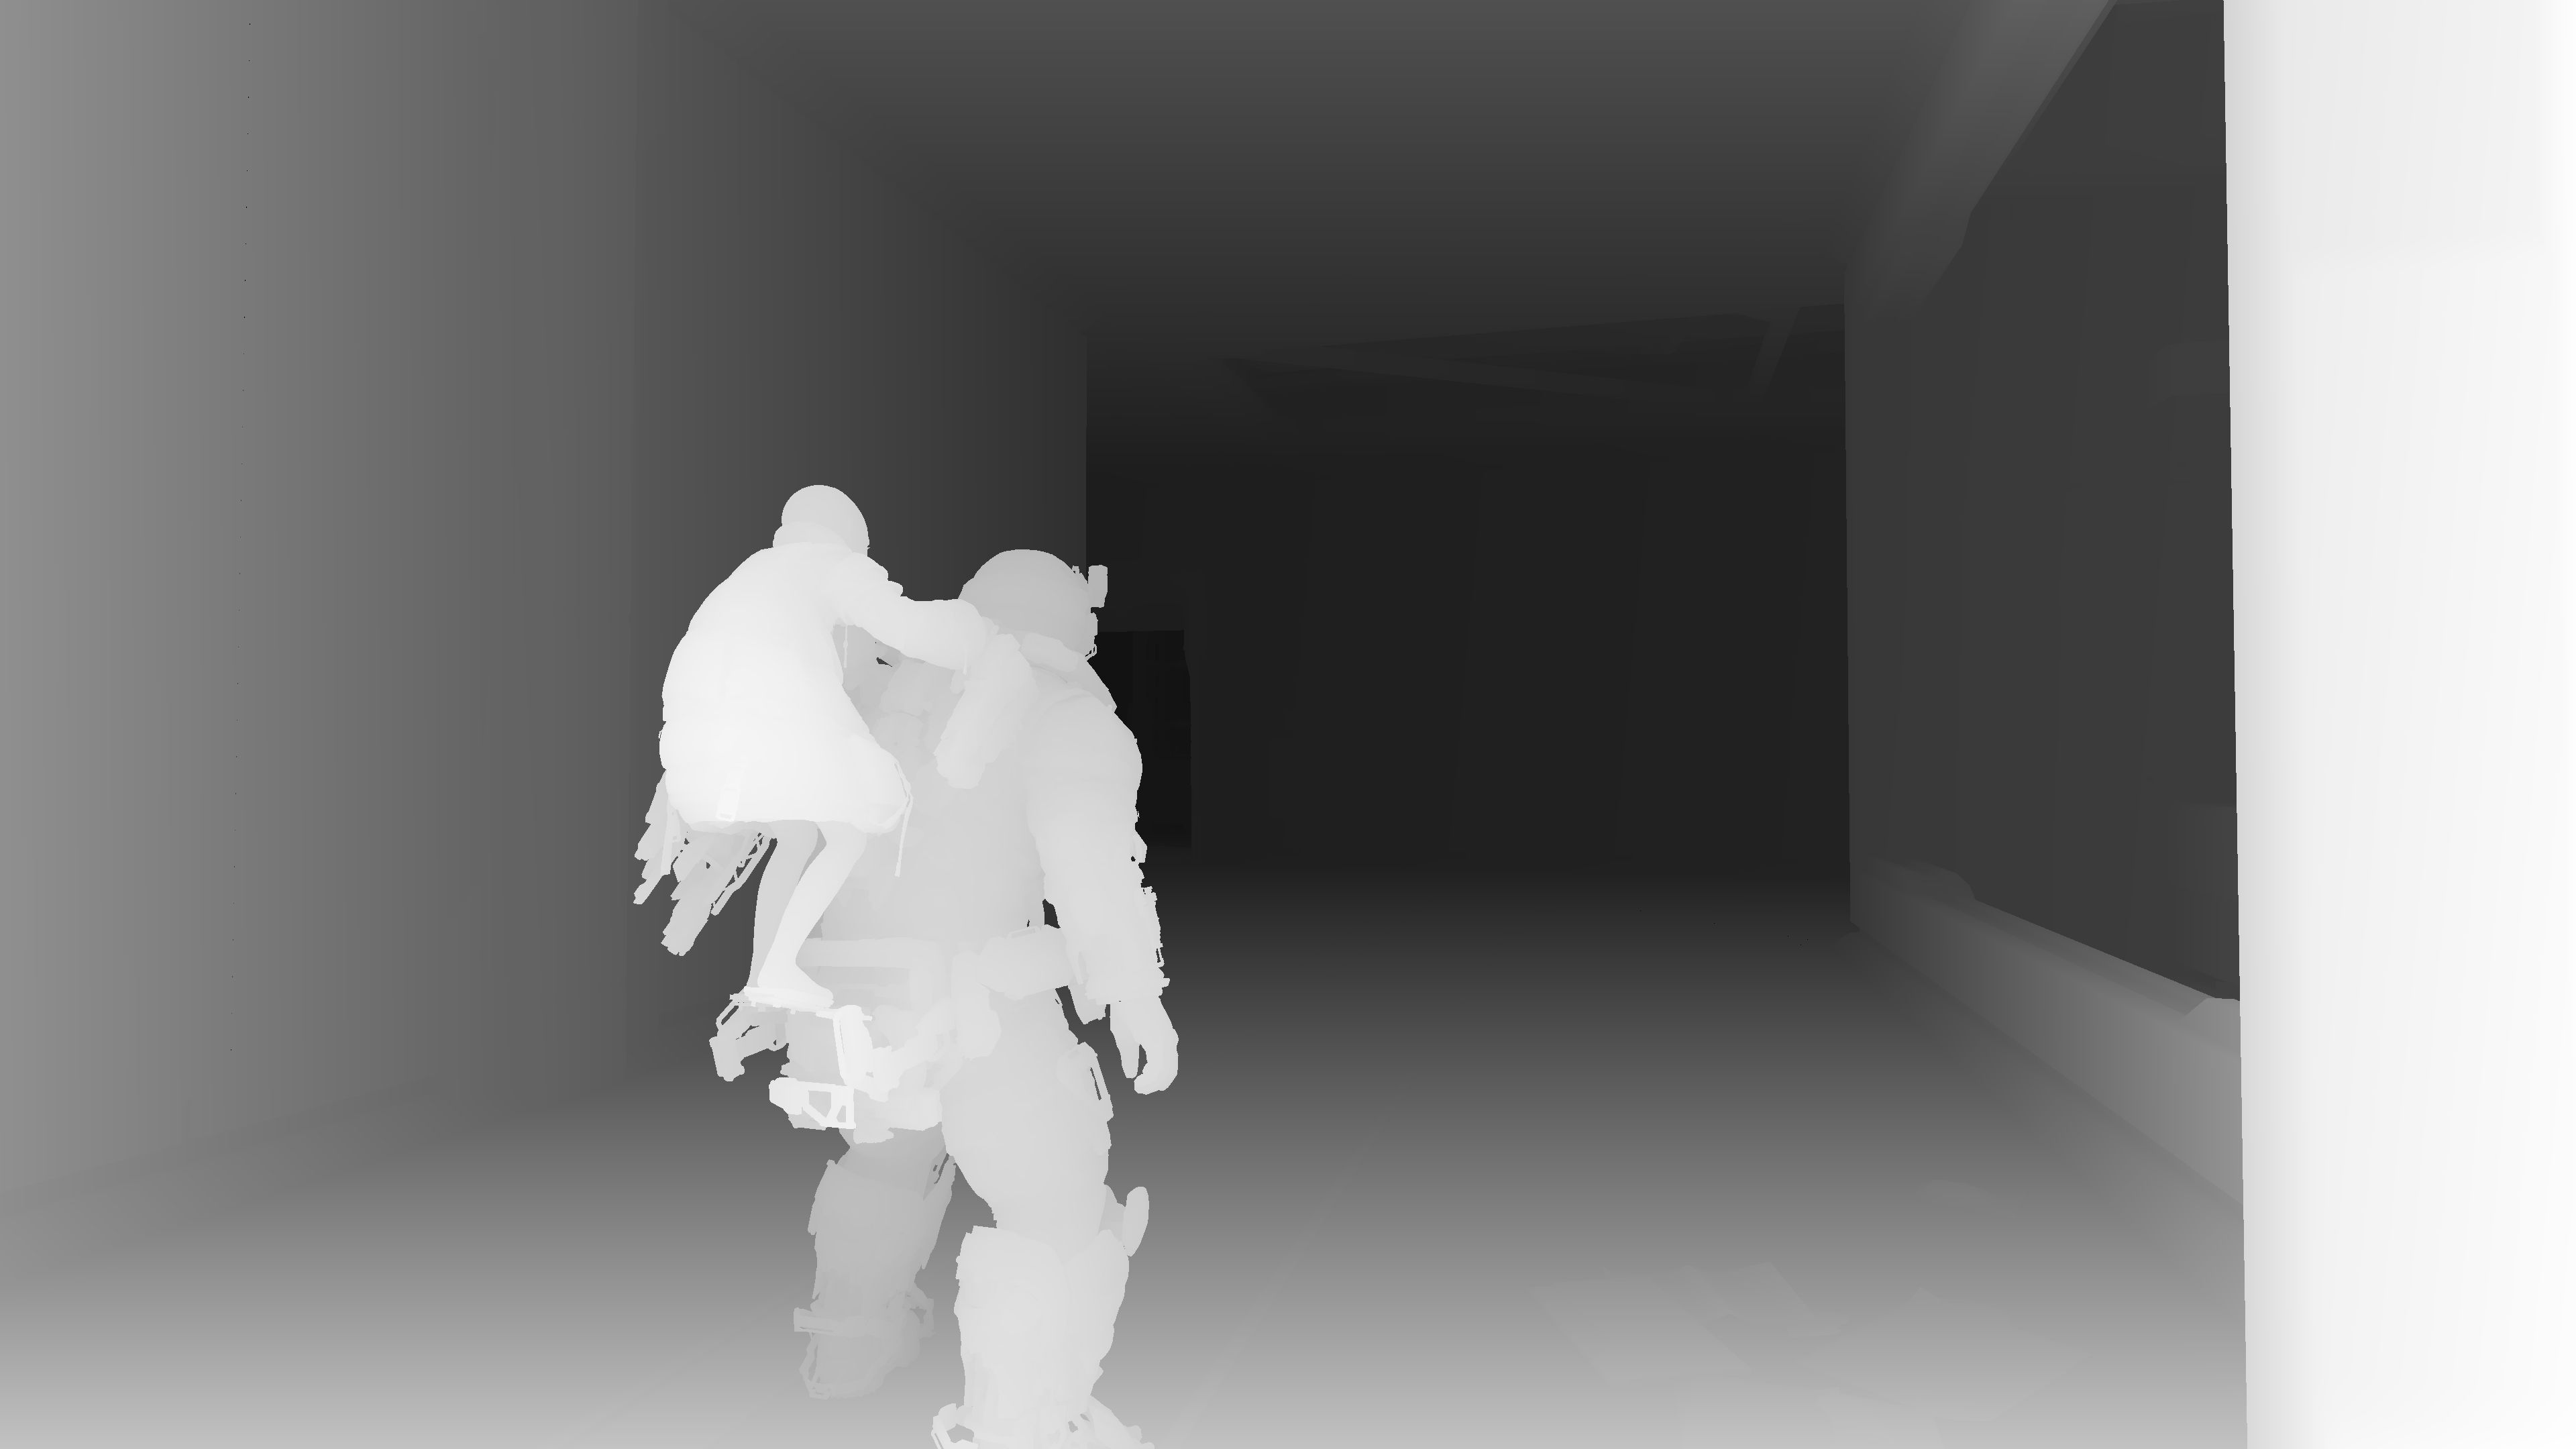
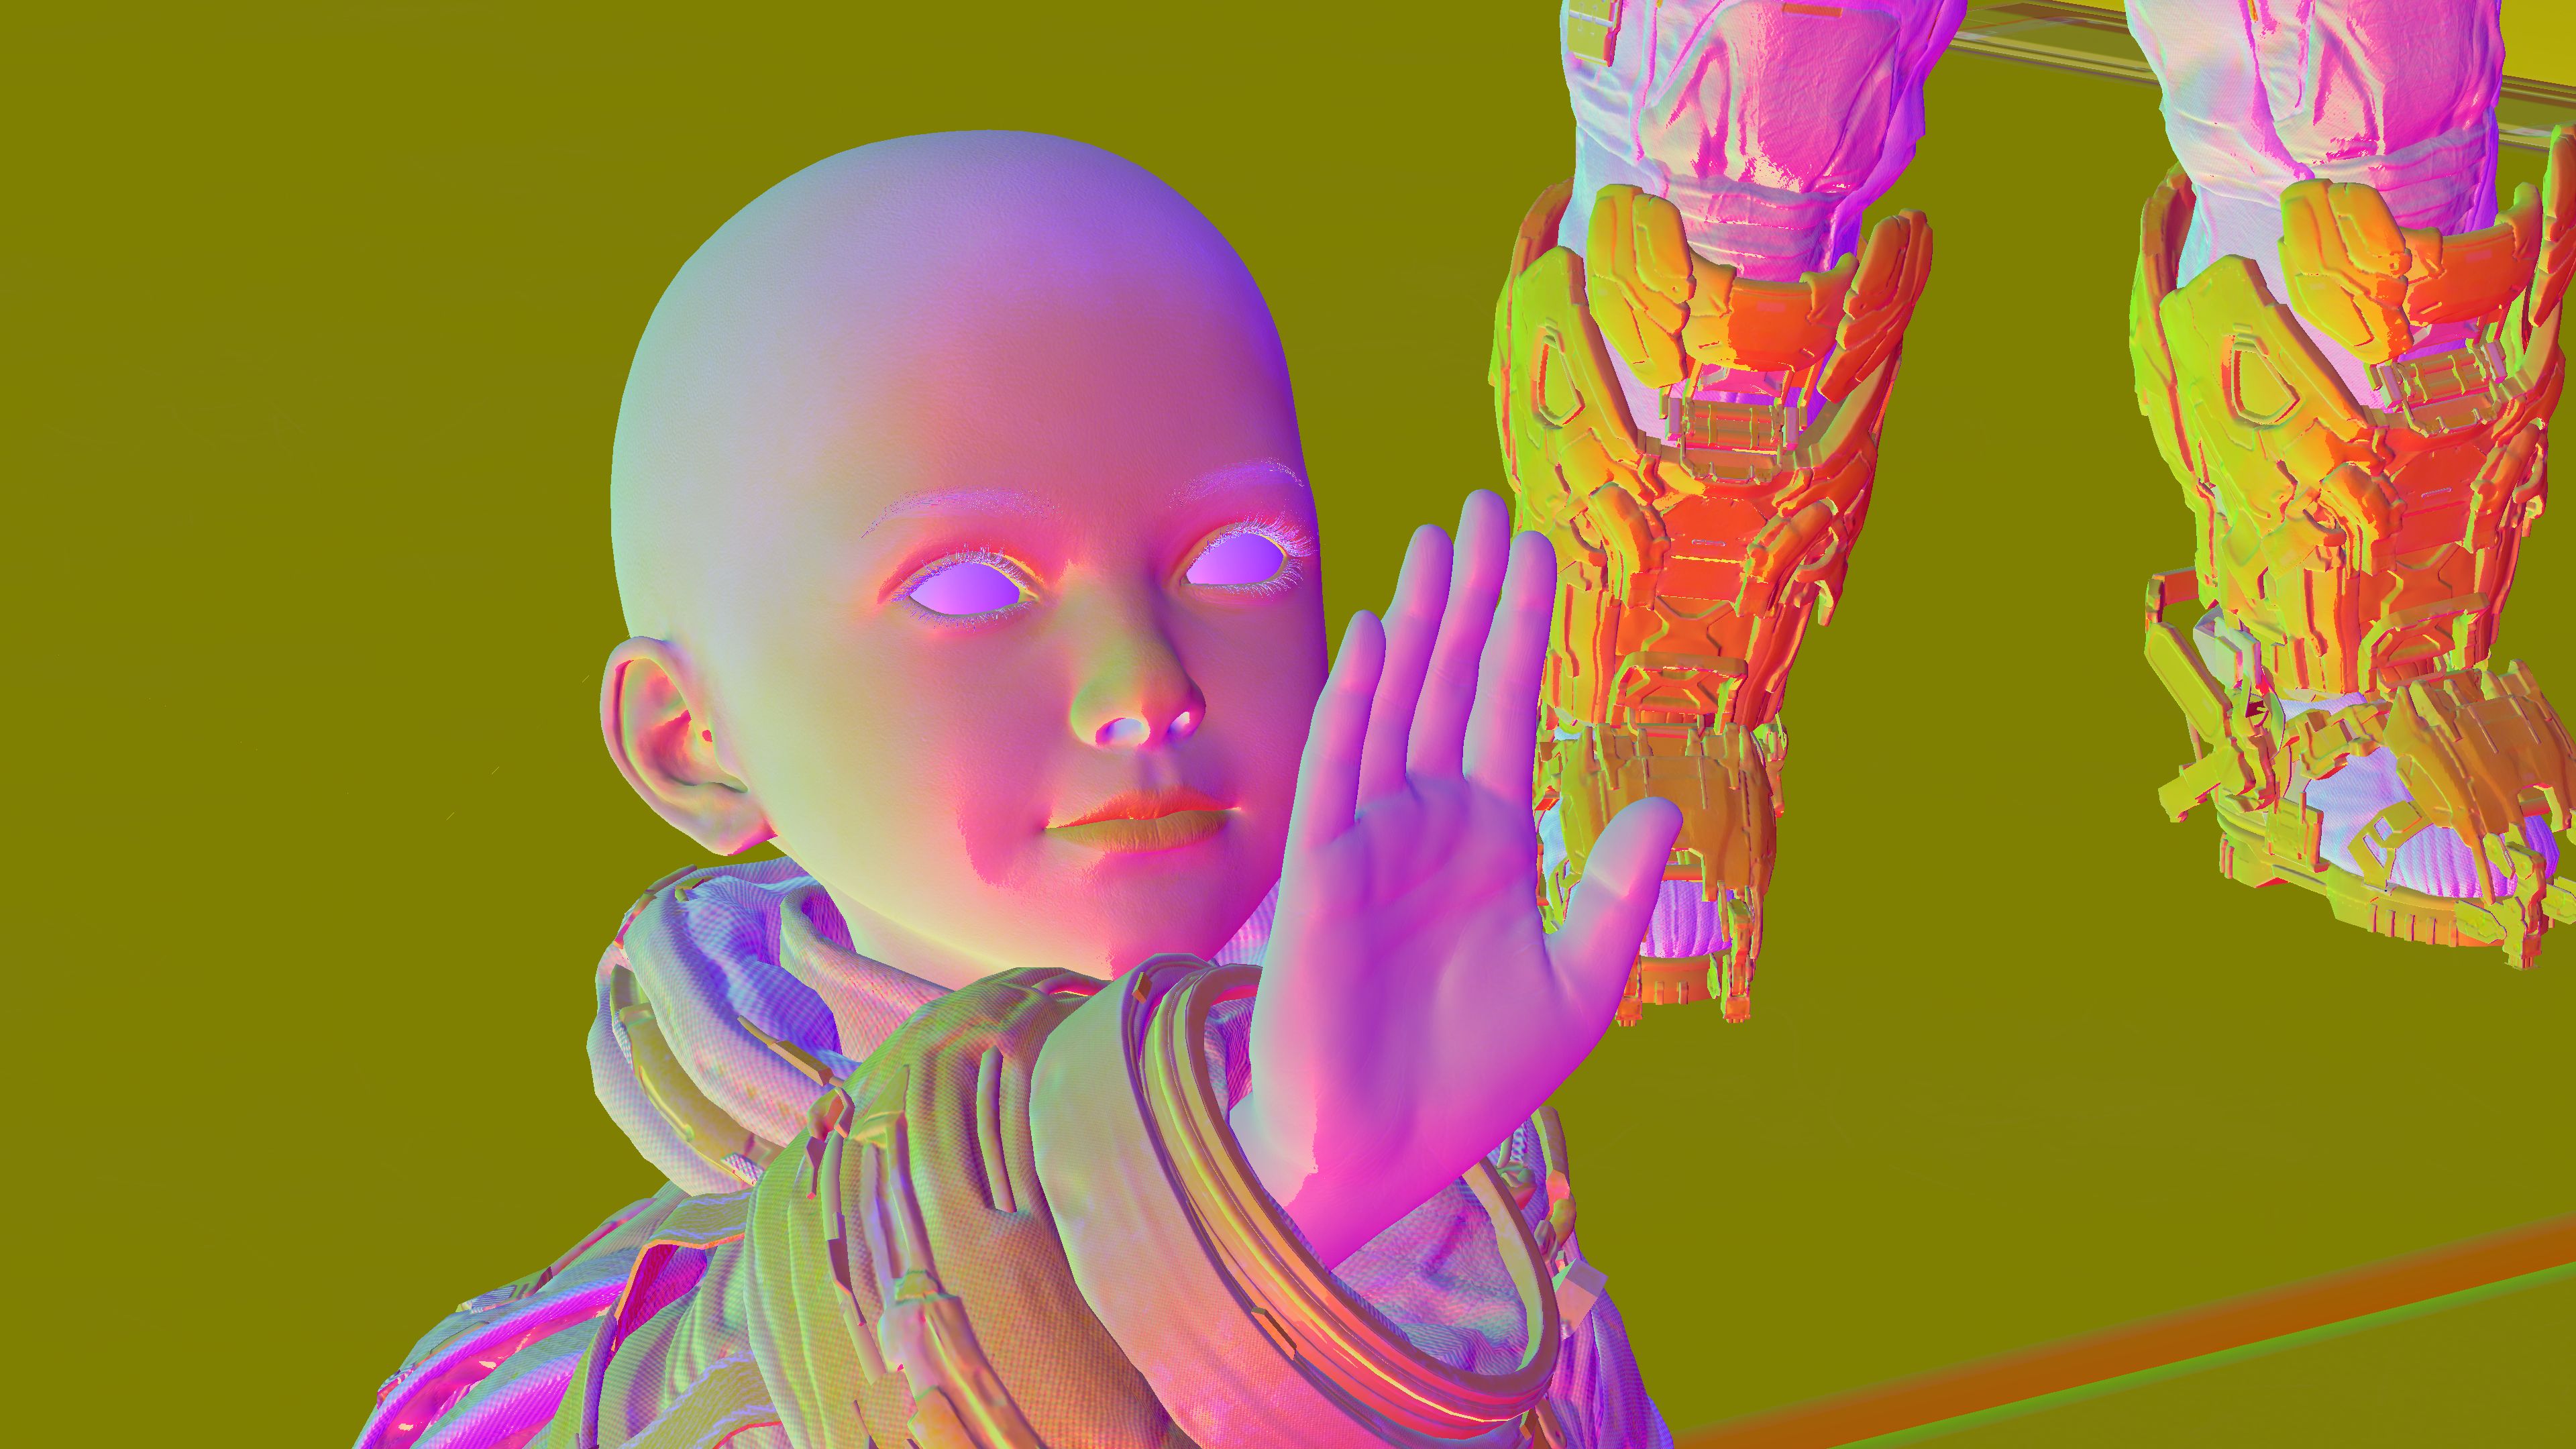
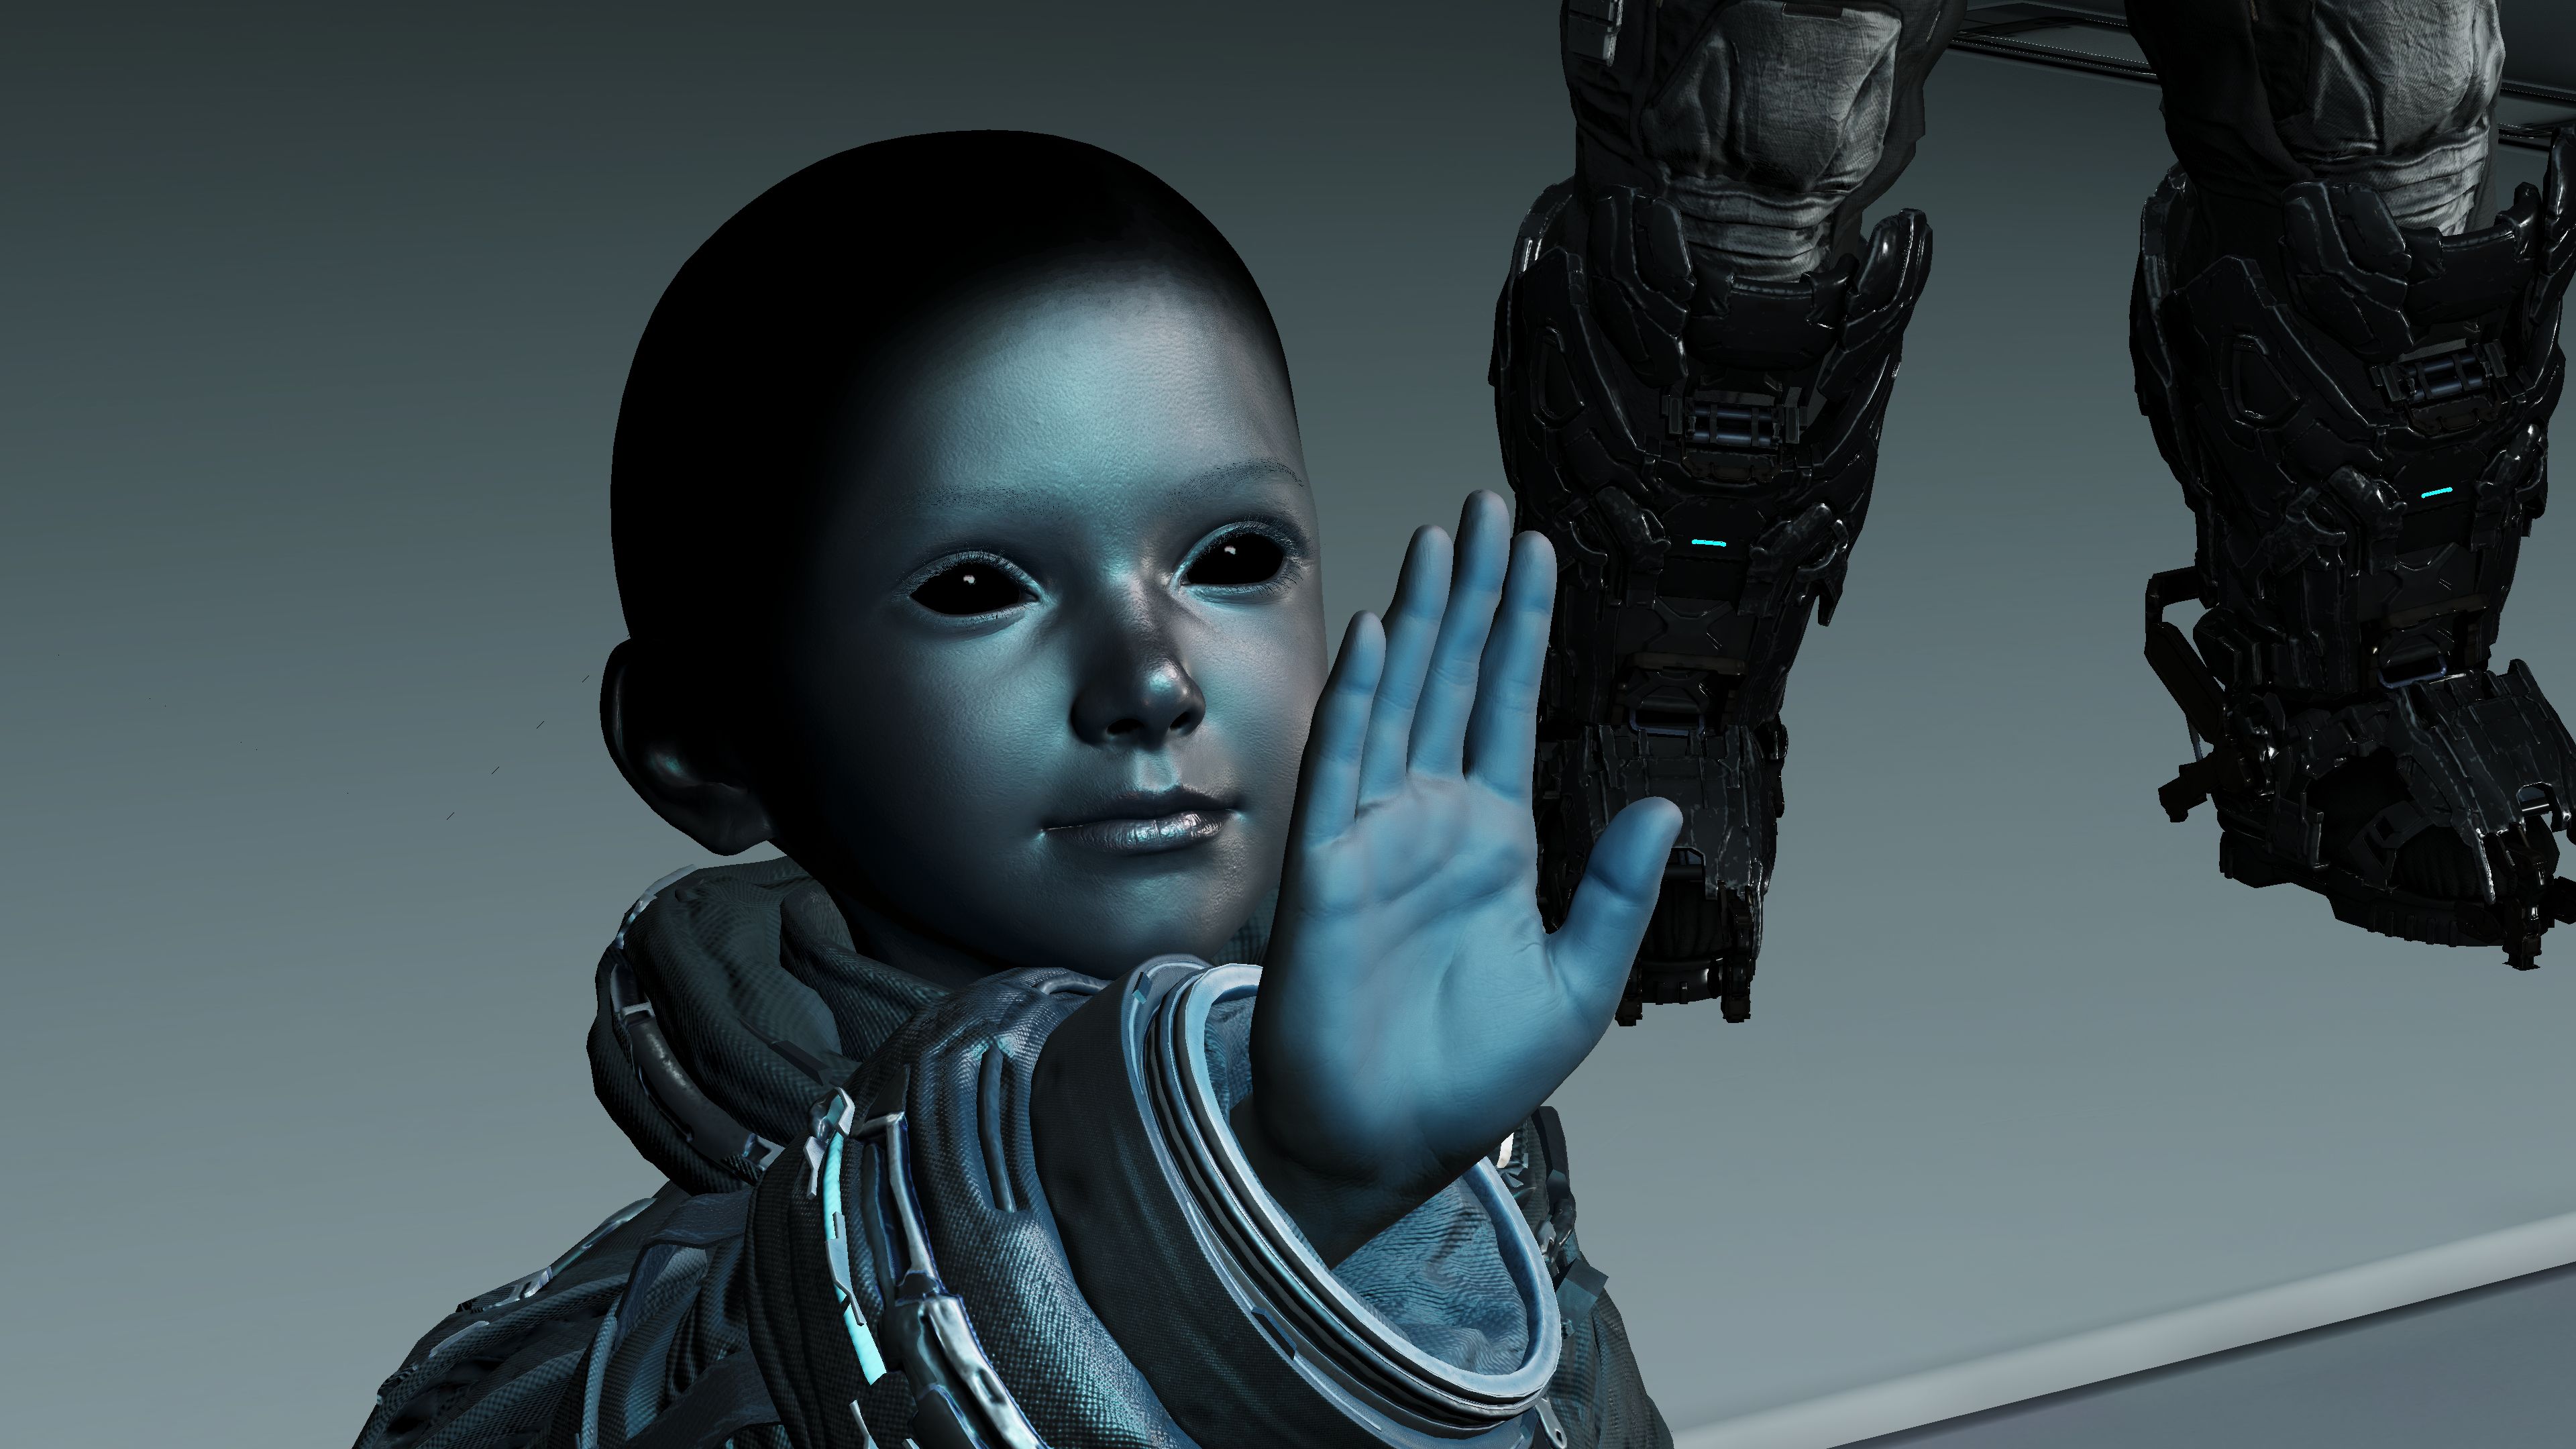
Closer look at Diana’s hair, because first, it is visually interesting, and second, the hair rendering done entirely ray-traced in compute as far as i can tell.


Diana’s hair is made of two geometries (two layers) the bottom one is 7742 prims, where the outer and larger one is 62908 prims.


BVHs are well managed..,

Instances & hierarchies,..


And rays & traversal heatmaps,..


Well, to a certain degree… Yes they’re!
Also, here are some of the Ray Tracing outputs during the entire process (the entire thing taking place at the course of multiple dispatches of course, some outputs becomes inputs for a following or subsequent dispatch/es, and so on)


i used a different frame than the ones used for the BVHs above because that close-up showing a lot of details, but the TLAS is EXACTLY like the 2nd one (the fight with the large robot), as both frames are taken during the fight despite the fact the one earlier during gameplay, and this one here is a Cinematic closeup
Funny enough, looking in the TLAS you see she is raising her “Left” hand, but in the final frame, it is “Right” hand,…so what do you think, is it a Left or a Right hand!!?


Ray Tracing Structs
struct LightAABB {
    vec3f aabbMin;
    vec3f aabbMax;
}

struct RTLightParamsGridHeaderCBV {
    vec4f cbLightAABBCenter;
    vec4f cbLightAABBLength;
}

struct RayTracingDenoiserConstantBufferInfo {
    uint32 WaveletStep;
    float AODistance;
    uint32 UserStencilMask;
    float compressEV;
    uint32 diff_RT_WIDTH;
    uint32 diff_RT_HEIGHT;
    float diff_INV_RT_WIDTH;
    float diff_INV_RT_HEIGHT;
    uint32 spec_RT_WIDTH;
    uint32 spec_RT_HEIGHT;
    float spec_INV_RT_WIDTH;
    float spec_INV_RT_HEIGHT;
    float diffuseMultipler;
    float specularMultipler;
    float modelScaler;
    float depthRejectionThresold;
    float specularRoughnessThreshold;
    uint32 disocclusionStep;
    float maxDiffuseHistory;
    float maxSpecularHistory;
    vec4f Rotator0;
    vec4f Rotator1;
    vec4f Rotator2;
    vec4f Rotator3;
    mat4x4f prevViewProjInvMat;
    uint32 diffuseMaxIterationCount;
    uint32 specularMaxIterationCount;
    uint32 ps5HeatmapMode;
    float heatmapMaxIntersectionCount;
    vec2f diffResolutionRatio;
    float GIHistoryThreshold;
    float GIFilterCenterWeight;
    float VFXDiffuseBoost;
    float VFXSpecularBoost;
    uint32 VFXSpecularMipBias;
    float VFXDiffuseResolutionRatio;
    float VFXSpecularResolutionRatio;
    float VFXInvalidateTemporalRatio;
    float VFXPrevSpecularResolutionRatio;
    float VFXTemporalCompositeRate;
    uint32 medianFilterStepSize;
    float specularSecondaryBounceRoughnessThreshold;
    vec2f diffInvResolutionRatio;
    vec2f specResolutionRatio;
    vec2f specInvResolutionRatio;
    float specularTraceRoughnessThreshold;
    uint32 diffuseDisocclusionFrameRange;
    float diffuseDisocclusionFilteringStrength;
    float specularTrackingSensitivity;
    float iblLeakingAmountDiff;
    float iblLeakingAmountSpec;
    float iblLeakingDistanceDiff;
    float iblLeakingDistanceSpec;
    vec2f diffUVAdjuster;
    vec2f specUVAdjuster;
    float specularTrackingSensitivityBase;
    float reserved0;
    float reserved1;
    float reserved2;
}

struct CheckerboardInfo {
    vec2f cbr;
    float cbr_scale;
    float cbr_using;
    vec2f cbr_padding;
    float cbr_mipmapReadjustRatio;
    int32 cbr_mipmapReadjustable;
}

struct EnvironmentInfo {
    uint32 timeMillisecond;
    uint32 frameCount;
    uint32 isOddFrame;
    uint32 reserveEnvironmentInfo;
    float breakingPBRSpecularIntensity;
    float breakingPBRIBLReflectanceBias;
    float breakingPBRIBLIntensity;
    float breakingPBRCubemapReflectionScale;
    uint32 vrsTier2Enable;
    uint32 dynamicTextureTableNullBlackHandle;
    uint32 prevTimeMillisecond;
    uint32 bindlessMaterialMaxNum;
    float rtLightRadius;
    float accurateVelocityDistanceSq;
    uint32 vendorInfo;
    float EnvironmentInfoReserved2;
    vec4f userGlobalParams[32];
    pad3072;
    vec4u dynamicTextureTableHandles[256];
    pad24576;
    vec4u bakedResourceSharedTablesHandles[32];
    pad3072;
}

struct CompressedHitInfo {
    uint32 baryYZ;
    uint32 instanceIndex_pixelPosXL;
    uint32 geometryIndex_pixelPosYB;
    uint32 primitiveIndex_pixelPosXH;
    vec3f wpos;
    uint32 rayDir;
}

struct RayTracingSettings {
    float RT_IBLBoost;
    float RT_SpecularRayLength;
    float RT_DiffuseRayLength;
    uint32 RT_Bounce;
    uint32 RT_DefaultMaxIterationCount;
    uint32 RT_DiffuseMaxIterationCount;
    uint32 RT_SpecularMaxIterationCount;
    float RT_PositionOffset;
    float RT_DLShadowMapKernelSizeScale;
    float RT_GuideNormalWeight;
    vec2u RT_padding;
}

struct InstanceData {
    uint32 materialByteOffset;
    uint32 geometryByteOffset;
    int32 startIndexLocation;
    uint32 baseVertexLocation;
    uint32 transparentMaskHandle;
    uint32 transparentMaskOffset;
    uint32 flags;
    uint32 reserved;
}

struct ShadowParameter {
    mat4x4f viewProjection;
    float variance;
    uint32 arrayIndex;
    uint32 translucentArrayIndex;
    float bias;
    vec2f renderClipPlane;
    uint32 resolution;
    uint32 pcssPackedParam;
    vec4f zToLinear;
}

struct LightParameter {
    vec3f position;
    float boundingRadius;
    vec3f direction;
    float falloff;
    vec4f attenuation;
    vec3f color;
    float tolerance;
    uint32 shadowIndex;
    uint32 iesId;
    vec2u reserved;
    vec4f ext;
    vec2u intensityScale;
    vec2u reserved2;
}

struct InstanceDesc {
    mat4x3f transform;
    uint32 instanceIDMask;
    uint32 instanceHitGroupIdx;
    uint32 accelerationStructure1;
    uint32 accelerationStructure2;
}Hair (Strand Based) [Compute]
An indirect dispatch kicks to draw hair, it is given a buffer of Vertices that is filled from an earlier compute that does the hair strand simulation, in addition to Depth, Atmospheric Transmittance Texture, Volumetric Fog Texture, Volumetric Particles Texture,…and many other data in form of bound structs/CBs.
Unfortunately many of these data inputs to the dispatch mentioned earlier are not in a state that allows them to be very visual here.
to summarize the entire Strand Hair thing,…

It is worth noting that the output is made of 5 layer (3840*2160*5), two of them usually occupied.
There are some details that may not be very visible in that previous image, so below i did boost the range a little, to make it visible, but the 1st image in the two images below, is basically the same as the previous image above this paragraph, i just boosted it.


Here is the status of the current hot resource (Frame, Depth & AO) once the results of this dispatch get composed back to the frame in a draw command after the dispatch.


Hair Structs
struct LineVertices {
    vec3f p;
    uint32 misc;
}

struct StrandBoundary {
    uint32 TargetWidth;
    uint32 TargetWidthHeight;
    float StrandBoundaryScale;
    float StrandBoundaryOffset;
}

struct Material {
    vec3f hm_sigma;
    float hm_IOR;
    float hm_cuticleTiltAngle;
    float hm_s;
    float hm_v;
    float hm_m0_roughness;
    float hm_f0;
    float hm_sqrt_s;
    float hm_sqrt_v;
    float hm_sqrt_roughness;
    float hm_fakeMultipleScatteringFactor;
    float hm_sigmaRndX;
    float hm_sigmaRndY;
    float hm_sigmaRndZ;
    vec3f hm_sigmaTip;
    float hm_tipRoughness;
    vec3f hm_sigmaTipRnd;
    float hm_rndRoughness;
    float hm_scaleWidth;
    float hm_minWidth;
    float hm_maxWidth;
    float hm_backscatterScale;
    float hm_global_transparency;
    float hm_shadowDensity;
    float hm_shadowPow;
    uint32 hm_guideShadingQualityLightMaxNum;
    float hm_guideShadingAdjustShading;
    float hm_guideShadingAdjustDensity;
    float hm_guideShadingQualityLightMaxNumOverDensity;
    float hm_depthwriteWithAlphaBlendingThrehold;
    uint32 hm_projLightNum;
    float hm_rootBlendRate;
    vec2f hm_shadingLodFactor;
    uint32 hm_segmentCount;
    float hm_albedoRate;
    float hm_indirectLightingMultiplier;
    float hm_azimuthalRoughness;
    float hm_primaryRoughness;
    uint32 hm_punctuallightLimit;
    uint32 hm_arealightLimit;
    float hm_stampRTTResolution;
    float hm_strandRenderScale;
    float hm_strandRenderInvserseScale;
    uint32 hm_renderType;
    float hm___;
}

struct LightInfo {
    uint32 PunctualLightCount;
    uint32 AreaLightCount;
    uint32 PunctualLightFowardCount;
    uint32 AreaLightFowardCount;
    vec2f LightCullingScreenSize;
    vec2f InverseLightCullingScreenSize;
    float LightCullingOffsetScale;
    uint32 RT_PunctualLightCount;
    uint32 RT_AreaLightCount;
    uint32 CubemapArrayCount;
    uint32 CapsuleLightCount;
    uint32 RT_CapsuleLightCount;
    uint32 CapsuleLight_Unused0;
    uint32 DisableContactShadowMask;
    vec2f BaseShadowMapRes;
    vec2f InverseBaseShadowMapRes;
    vec3f DL_Direction;
    uint32 DL_Enable;
    vec3f DL_Color;
    float DL_SpecularControl;
    vec3f DL_VolumetricScatteringColor;
    float DL_PCSS_KERNEL;
    mat4x4f DL_TextureProjection;
    uint32 DL_TextureBindlessIndex;
    float DL_ReceiverSlopeBiasScale;
    float DL_ContactShadow;
    uint32 DL_CalcTranslucency;
    uint32 DL_ShadowCasterCulling;
    uint32 DL_TextureProjectionOnly;
    float DL_Variance;
    float DL_Bias;
    float DL_NormalClipAngle;
    uint32 DL_SSTScreenShadowEnable;
    float DL_SSTScreenShadowScale;
    float DL_SSTBias;
    mat4x4f DL_SSTMatrix;
    mat4x4f DL_ViewProjection;
    vec4u DL_ArrayIndex;
    vec4u DL_TranslucentArrayIndex;
    vec4u DL_OcclusionCullingIndex;
    vec4f DL_ZToLinear;
    vec2u DL_Option;
    vec2u DL_IntensityScale;
    vec3f Cascade_Translate1;
    float Cascade_Bias1;
    vec3f Cascade_Translate2;
    float Cascade_Bias2;
    vec3f Cascade_Translate3;
    float Cascade_Bias3;
    vec2f Cascade_Scale1;
    vec2f Cascade_Scale2;
    vec2f Cascade_Scale3;
    float Cascade_FadeBorder;
    uint32 Cascade_Flag;
    vec4f Cascade_Distance;
    float Cascade_ExtensionRange;
    float DL_TextureProjectionFadeDistSquared;
    float DL_TextureProjectionFadeRangeSquared;
    float DL_TextureProjectionFadeMaxRate;
    vec4f Cascade_ShadowMapResX;
    vec4f Cascade_ShadowMapResY;
    vec4f Cascade_InverseShadowMapResX;
    vec4f Cascade_InverseShadowMapResY;
    vec3f Atmopshere_Reserved;
    uint32 Atmosphere_Flags;
    vec3f SDFShadowTranslate;
    float SDFShadowNearFarRatio;
    float SDFShadowStartDistance;
    float SDFShadowFadeDistance;
    float SDFShadowEndDistance;
    uint32 SDFShadowFlags;
    uint32 lightProbeOffset;
    uint32 sparseLightProbeAreaNum;
    uint32 tetNumMinus1;
    uint32 sparseTetNumMinus1;
    float smoothStepRateMinus;
    float smoothStepRateRcp;
    float worldPositionOffsetBias;
    uint32 depthBlockerSize;
    vec3f AOTint;
    uint32 AO_Unused;
    vec3f LightProbe_WorldOffset;
    float ReflectionProbeBoost;
    vec4f ShadowSamplePoints[8];
    pad768;
    float softShadowBackProjectionRate;
    uint32 ShadowMissPositionSize;
    float shadowReserved1;
    float shadowReserved2;
    uint32 DPGIMaterial;
    vec3u Padding;
}

struct SceneInfo {
    mat4x4f viewProjMat;
    mat4x3f transposeViewMat;
    mat4x3f transposeViewInvMat;
    vec4f projElement[2];
    pad192;
    vec4f projInvElements[2];
    pad192;
    mat4x4f viewProjInvMat;
    mat4x4f prevViewProjMat;
    vec3f ZToLinear;
    float subdivisionLevel;
    vec2f screenSize;
    vec2f screenInverseSize;
    vec2f cullingHelper;
    float cameraNearPlane;
    float cameraFarPlane;
    vec4f viewFrustum[8];
    pad768;
    vec4f clipplane;
    vec2f vrsVelocityThreshold;
    uint32 GPUVisibleMask;
    uint32 resolutionRatioPacked;
    vec3f worldOffset;
    uint32 sceneInfoMisc;
    vec4u rayTracingParams;
    vec4f sceneExtendedData;
    vec2f projectionSpaceJitterOffset;
    float tessellationParam;
    uint32 sceneInfoAdditionalFlags;
}

struct RangeCompress {
    float rangeCompress;
    float rangeDecompress;
    float prevRangeCompress;
    float prevRangeDecompress;
    float rangeCompressForResource;
    float rangeDecompressForResource;
    float rangeCompressForCommon;
    float rangeDecompressForCommon;
}Early Particles
Early Particles is the fancy name i gave to this step, as at the case of Cinematics there are two steps of particles rendering that spread away by other effects in-between them. The other step clearly below is called Late Particles. But this separation is only at the case of Cinematic frame. But at the case of Gameplay, there is only one step, which is this Early Particles step. So you can consider it just “Particles” at the case of looking into a Gameplay frame, or “Early Particles” if we’re looking into a Cinematic frame.
A sequence of small passes made of sequences of DrawIstanced and DrawIndexedInstanced, each works on a unique type of pipeline that delivers a uniquely featured particles effect. The unique type of particles are including (not in any specific order, where at most cases they go in that same order, but some of them maybe absent in some frames or others would present in Cinematics and not gameplay)
Particles Renderers
- Billboard3DTextureBlendLiFgRiDefault
- RibbonRiDefault
- Billboard3DNoSoft
- Ribbon
- RibbonDefault
- RibbonRiNoSoft
- EmissiveOnly
- EmissiveOnlyCpuLighting
- Billboard3DCutoutRiDefault
- Billboard3DCutoutRiDefault
- Billboard3DRiPdDefault
- Billboard3DCutoutNoSoft
- Billboard3DCutoutAcDefault
- PolygonCutoutNoSoft
- Polygon
- PolygonCutoutDefault
During all those passes, regardless how many or how few are there, it depends on the frame, drawing takes place on the lit frame directly in addition to a full resolution Effects Mask that will be needed later in the frame lifetime.


It is worth noting that depth at this point not getting impacted with any particles drawing, even though there were some what so called “Polygon” particles. So you can consider it in a read-only state.
Here this example in action (Click gifs to open in full internal resolution on YouTube)


For the purpose of drawing, a wide range of fancy FX-Artist-Authored textures are used to do all the magic. For that given frame above, this variations of textures below used across all the steps, so one texture could be used for example with a Ribbon and a Billboard.


Images with black background in this collection, mostly did not have alpha channel, you an tell from the format anyways (if the format has an Alpha component, and i left it here in black background, this is because the alpha was in fact solid color! like this diamonds one in the middle of the last row)
Early Particles Structs (open at your won cost)
struct SceneInfo {
    mat4x4f viewProjMat;
    mat4x3f transposeViewMat;
    mat4x3f transposeViewInvMat;
    vec4f projElement[2];
    pad192;
    vec4f projInvElements[2];
    pad192;
    mat4x4f viewProjInvMat;
    mat4x4f prevViewProjMat;
    vec3f ZToLinear;
    float subdivisionLevel;
    vec2f screenSize;
    vec2f screenInverseSize;
    vec2f cullingHelper;
    float cameraNearPlane;
    float cameraFarPlane;
    vec4f viewFrustum[8];
    pad768;
    vec4f clipplane;
    vec2f vrsVelocityThreshold;
    uint32 GPUVisibleMask;
    uint32 resolutionRatioPacked;
    vec3f worldOffset;
    uint32 sceneInfoMisc;
    vec4u rayTracingParams;
    vec4f sceneExtendedData;
    vec2f projectionSpaceJitterOffset;
    float tessellationParam;
    uint32 sceneInfoAdditionalFlags;
}

struct PreCalcParticleLighting {
    vec3f diffuse;
    uint32 inShadow;
    vec4f fogInfluence;
}

struct Polygon3DConstant
{
    float cbDepthBias;
    float cbSoftParticleDist;
    float cbFadeCone;
    float cbFadeSpread;
    vec3f cbFadeConeDir;
    float cbFadeAlphaRate;
    vec4f cbFadeDepth;
    vec3f cbOcclusionSphereOffset;
    float cbOcclusionSphereRadius;
    float cbOcclusionSizeRate;
    uint32 cbEffect3DFlags;
    float cbDofNear;
    float cbDofMaxScale;
    float cbDofMinAlpha;
    uint32 cbDofUsingMipLevel;
    float cbDofVanishDistance;
    float cbFadeEnableAngle;
    float cbLumaBleed;
    float cbLumaSlide;
    float cbLumaScale;
    float cbLumaBias;
    float cbLumaTexelScale;
    float cbDistInfluence;
    float cbDensityColorMin;
    float cbDensityColorMax;
    float cbDensityAlphaMin;
    float cbDensityAlphaMax;
    uint32 cbMotionBlurIteration;
    float cbMotionBlurScale;
    uint32 cbFluidDebugModeFlags;
    uint32 cbProjectionUVScale_VOffset;
    float cbFlowStrength;
    float cbProjectionAdjust;
    vec3f cbShadowColor;
    float cbProjectionTimeScale;
    vec4f cbMieVolumetricParticleConstants;
    vec4f cbProjectionUV;
    vec3f cbEmitterPos;
    float cbIntensityScale;
    float cbPostEdgeDropoff;
    float cbAlphaRate;
    float cbMieDropoff;
    float cbIntensity3D;
    vec4f cbEdgeOuterColor3D;
    vec2f cbOffset;
    float cbEdgeBlendRange3D;
    float cbEmissiveRate;
    float cbUsePhysicalAlphaBlend3D;
    float cbDetonemapRate;
    float cbPtFadeCone;
    float cbPtFadeSpread;
    float cbPtFadeAlphaRate;
    float cbPtFadeEnableAngle;
    float cbPtFadeinStart;
    float cbPtFadeinEnd;
    vec3f cbProcDistTimes;
    float cbSSRAlphaThreshold;
    vec2f cbUvSeqRect;
    vec2f cbProcDistUVScale;
    float cbProcDistVorWFreq;
    float cbProcDistVorWAmp;
    float cbProcDistHFreqorWAmpCoef;
    float cbProcDistHAmporWOffset;
    float cbProcDistOFreq;
    float cbProcDistOAmp;
    float cbProcDistOFreqNoiseFreq;
    float cbProcDistOFreqNoiseAmp;
    float cbProcDistOAmpNoiseFreq;
    float cbProcDistOAmpNoiseAmp;
    float cbShadowMultiplier;
    float cbStochasticAlphaCoverage;
    vec3u cbTexUnitColor;
    uint32 cbEffect3DPlayerColor;
    vec3f cbTexUnitColorRate;
    float cbInterleaveScale;
    vec4f cbTypeParam3D;
    vec3f cbTextureFilter;
    uint32 cbEffect3DFlags2;
    vec2f cbDistortionSpecular;
    vec2f cbFakeVolume;
    vec4f cbContrastHighlighter;
    uint32 cbContrastHighlighterColor;
    float cbContrastHighlighterIntensity;
    uint32 cbHighBrightnessColor;
    uint32 cbLowBrightnessColor;
    float cbHighBrightnessIntensity;
    float cbLowBrightnessIntensity;
    float cbHighGradingBorder;
    float cbLowGradingBorder;
    vec4u cbTexelChannelOperatorParam;
    float cbEvPow2;
    float cbEvOffsetPow2;
    float cbFadeSide;
    float cbDistortionAlphaBlend;
    vec3f cbStretchVector;
    uint32 cbEffect3DFlags3;
    vec3f cbStretchPos;
    uint32 cbStretchFade;
    vec2f cbSamplingSize;
    float cbAlphaIntensity;
    float cbStrengthBlur;
    vec4f cbScaleByDepthDepth;
    vec2f cbScaleByDepthScale;
    vec2f cbVolumetricLighting;
    vec4u cbParamRgbItem3D;
    vec4u cbParamRgbItem3D2;
    float cbLightShadowRatio;
    float cbBackfaceLightRatio;
    float cbDirectionalLightShadowRatio;
    uint32 cbDistortionSpecularColor;
    uint32 cbLightingCoef;
    float reserved0;
    float reserved1;
    float cbMinAlpha;
}

struct Tonemap {
    float exposureAdjustment;
    float tonemapRange;
    float specularSuppression;
    float sharpness;
    float preTonemapRange;
    int32 useAutoExposure;
    float echoBlend;
    float AABlend;
    float AASubPixel;
    float ResponsiveAARate;
    float OpacityResponsiveAARate;
    float StopClampWindowSize;
    float VelocityWeightRate;
    float DepthRejectionRate;
    float ContrastTrackingRate;
    float ContrastTrackingThreshold;
    float LEHighlightContrast;
    float LEShadowContrast;
    float LEDetailStrength;
    float LEMiddleGreyLog;
    float LEBilateralGridScale;
    float LEBilateralGridBias;
    float LEPreExposureLog;
    int32 LEBlurredLogDownsampleMip;
    float CBTonemap_Padding;
    vec2i LELuminanceTextureSize;
}

struct RangeCompressInfo {
    float rangeCompress;
    float rangeDecompress;
    float prevRangeCompress;
    float prevRangeDecompress;
    float rangeCompressForResource;
    float rangeDecompressForResource;
    float rangeCompressForCommon;
    float rangeDecompressForCommon;
}

struct GpuParticleVS {
    float depthBias;
    float softParticleDist;
    float fadeCone;
    float fadeSpread;
    vec3f fadeConeDir;
    float fadeAlphaRate;
    vec4f fadeDepth;
    vec3f occlusionSphereOffset;
    uint32 gpuEffectFlag;
    float occlusionSphereRadius;
    float occlusionSizeRate;
    float dofNear;
    float dofMaxScale;
    float dofMinAlpha;
    uint32 dofUsingMipLevel;
    float dofVanishDistance;
    float fadeEnableAngle;
    float lumaBleed;
    float lumaSlide;
    float lumaScale;
    float lumaBias;
    vec2f texRect;
    float lumaTexelScale;
    float detonemapRate;
    vec3f emitterPos;
    uint32 emitterColor;
    uint32 alphaCorrection;
    float alphaRate;
    float usePhysicalAlphaBlend;
    float fadeEmitterCone;
    float fadeEmitterSpread;
    float fadeEmitterAlphaRate;
    float fadeEmitterEnableAngle;
    float fadeEmitterFadeinStart;
    float fadeEmitterFadeinEnd;
    float textureFilterAlphaRate;
    float textureFilterAlphaHPThreshold;
    float textureFilterAlphaHPMinValue;
    vec2f fakeVolume;
    vec2f scaleByDepthScale;
    vec4f contrastHighlighter;
    uint32 contrastHighlighterColor;
    float contrastHighlighterIntensity;
    float texEVPow2;
    float evOffsetPow2;
    vec4f scaleByDepthDepth;
    uint32 gpuEffectFlag2;
    float intensityScale;
    float stochasticAlphaCoverage;
    float ssrAlphaThreshold;
    vec4u cbParamRgbItem;
    vec4u cbParamRgbItem2;
    vec4u cbTexelChannelOperatorParam;
    vec2f distSpecular;
    float distInfluence;
    float distAlphaBlend;
    uint32 distColor;
    float interleaveScale;
    float cbReserved1;
    float cbReserved2;
}

struct PrimitiveMeshInstance {
    float x;
    float y;
    float emitTime;
    float partNoF;
    vec4f transform[3];
    pad288;
    float currentInvScaleByDepthScale;
    uint32 instanceIdInParts;
    uint32 pattern;
    uint32 instanceID;
}

struct PrimitiveMeshEmitterCB {
    float cbPrimMeshStochasticAlphaCoverage;
    uint32 cbPrimMeshEmitterLightIndex;
    float cbPrimMeshEmitterEvPow2;
    uint32 cbPrimMeshEmitterFlags;
    float cbPrimMeshEmitterFadeCone;
    float cbPrimMeshEmitterFadeSpread;
    float cbPrimMeshEmitterFadeAlphaRate;
    float cbPrimMeshEmitterEmitterFadeCone;
    float cbPrimMeshEmitterEmitterFadeSpread;
    float cbPrimMeshEmitterEmitterFadeAlphaRate;
    float cbPrimMeshEmitterSSRAlphaThreshold;
    float cbPrimMeshEmitterTimer;
    vec3f cbPrimMeshEmitterEmitterPosition;
    float cbPrimMeshEmitterEmitterFadeInStart;
    vec3f cbPrimMeshEmitterFadeConeDir;
    float cbPrimMeshEmitterEmitterFadeInEnd;
    vec4f cbPrimMeshEmitterFadeDepth;
    float cbPrimMeshEmitterLightShadowRatio;
    float cbPrimMeshEmitterBackfaceLightRatio;
    float cbPrimMeshEmitterDirectionalLightShadowRatio;
    int32 cbPrimMeshEmitterMeshInstanceIndex;
    vec4f cbPrimMeshEmitterScaleDepthDepth;
    vec2f cbPrimMeshEmitterScaleDepthScale;
    float cbPrimMeshEmitterShadowMultiplier;
    uint32 cbPrimMeshEmitterLightingCoef;
}

struct UserMaterial {
    vec4f VAR_BorderMask_U;
    vec4f VAR_BorderMask_V;
    vec4f VAR_FresnelMask;
    vec4f VAR_VertexAlpha_LevelPow;
    vec4f VAR_ColorParam;
    vec4f VAR_Gradient_LowColor;
    vec4f VAR_Gradient_HighColor;
    vec4f VAR_Base_BlendMode;
    vec4f VAR_Base1_ChSwitch;
    vec4f VAR_Base1_TileOffset;
    vec4f VAR_Base1_LevelPow;
    vec4f VAR_Base1_Alpha_LevelPow;
    vec4f VAR_Base1_PatternSettings;
    vec4f VAR_Base1_PlayType;
    vec4f VAR_VolumeBlend_LevelPow;
    vec4f VAR_Alpha1_TileOffset;
    vec4f VAR_Alpha1_LevelPow;
    float VAR_Alpha1_Rotate;
    float VAR_Invert_VolumeBlend;
    float VAR_VolumeBlend;
    float VAR_DetoneMapRate;
    float VAR_Use_VertexAlpha;
    float VAR_Use_Gradient_Map;
    float VAR_Use_Gradient_Alpha;
    float VAR_Gradient_AlphaMapBlend;
    float VAR_Use_Base_PhysicalBlend;
    float VAR_Base_EV;
    float VAR_Base_ColorRate;
    float VAR_Base_EmissiveRate;
    float VAR_Base_AlphaRate;
    float VAR_Use_Base1_Monotone;
    float VAR_Use_Base1_ClampTiling;
    float VAR_Base1_Rotate;
    float VAR_Base1_PatternNo;
    float VAR_Base1_PlaySpeed;
    float VAR_Base1_Speed_U;
    float VAR_Base1_Speed_V;
    float VAR_Alpha_Rate;
    float VAR_Alpha1_Rate;
    float VAR_Use_Alpha1;
    float VAR_Use_Alpha1_PolarCoordinate;
    float VAR_Alpha1_Sync;
    float VAR_Alpha1_Speed_U;
    float VAR_Alpha1_Speed_V;
    float CAPCOM_MATERIAL_RESERVE;
}

struct PrimitiveMaterialConstant {
    vec2f pmcOffset;
    float pmcMieDensityMin;
    float pmcMieDensityMax;
    vec3f pmcMieShadowColor;
    float pmcMieAlphaScale;
    vec2f pmcScaleByDepthScale;
    float pmcMieDropoff;
    uint32 pmcFlags;
    vec4f pmcScaleByDepthDepth;
    vec3f pmcEmitterPos;
    float pmcDepthBias;
    uint32 pmcEmitterColor;
    float pmcLightIntensity;
    float pmcEvPow2;
    float pmcSSRAlphaThreshold;
    vec3f pmcFadeConeDir;
    float pmcFadeAlphaRate;
    vec4f pmcFadeDepth;
    float pmcFadeCone;
    float pmcFadeSpread;
    float pmcFadeEmitterCone;
    float pmcFadeEmitterSpread;
    float pmcFadeEmitterAlphaRate;
    float pmcFadeEmitterFadeinStart;
    float pmcFadeEmitterFadeinEnd;
    float pmcOcclusionSizeRate;
    vec3f pmcOcclusionSphereOffset;
    float pmcOcclusionSphereRadius;
    float pmcLightShadowRatio;
    float pmcBackfaceLightRatio;
    float pmcDirectionalLightShadowRatio;
    float pmcEmitterTimer;
    float pmcReserved;
    float pmcMinAlpha;
    float pmcShadowMultiplier;
    uint32 pmcLightingCoef;
}

struct CheckerBoardInfo {
    vec2f cbr;
    float cbr_scale;
    float cbr_using;
    vec2f cbr_padding;
    float cbr_mipmapReadjustRatio;
    int32 cbr_mipmapReadjustable;
}It is worth mention that during all of these steps, these two are GPU particles


Also during early particles, things such as the effects on the eyes are taking place. For example, the fancy eye lens effects of Diana’s always taking place during this phase, usually under 3 different categories of effects:
– Emissive Only
– Emissive Only CPU Lighting
– Billboard 3D Cutout Ri Default

Lens Flare Image [Not Always]
As long as there are some lens flares present in the frame, this step will take place in order to generate the Lens Flare Image in 1/2 of the target resolution. If no lens flares present, the Lens Flare Image is still kept, but as an empty solid black texture.
There is no difference between a Cinematic or a Gameplay frame, both doing the exact same thing during this step, which is stamping or drawing —DrawIndexedInstanced— the flares one by one into the Lens Flare Image. The Lens Flare image prepared during this step is to be composited later in a later step called Lens Flare Composite or “Fake” Lens Flare as the engine internally referring to it.
So given that final 3840*2160 frame during gameplay

This is how the generated 1920*1080 Lens Flare Image looked like

And in action (Click gif to open in full internal resolution on YouTube)

And in order to produce that Lens Flare Image for that frame, the collection below of these magical textures are well utilized


You are not necessarily will see the impact of each of them, but all of those impacted that example frame, some were obvious, where others were super super subtle
And during all those draw commands (around ~145 for that given sample frame), a single struct keeps coming on the table (unfold below)
Lens Flare Image (Lens Flare Prepare) Structs
struct LensflareConstant {
    float cbLensflareDistance;
    float cbLensflareIntensityOffset;
    float cbLensflareScaleOffset;
    float cbLensflareBorderWidth;
    vec2f cbLensflareOffset;
    float cbLensflareBorderOffset;
    float cbLensflareAspectRatio;
    uint32 cbLensflareOccludeSampleCount;
    float cbLensflareOccludeSampleRadius;
    float cbLensflareFadeStart;
    float cbLensflareFadeEnd;
    vec2f cbLensflareRotationOffset;
    float cbLensflareTranslationVertical;
    float cbLensflareTranslationHorizontal;
    vec4f cbLensflareGlobalColor;
    vec3f cbLensflareFadeConeDir;
    float cbLensflareGlobalIntensity;
    float cbLensflareFadeConeAngle;
    float cbLensflareFadeSpreadAngle;
    float cbLensflareFadeNearStart;
    float cbLensflareFadeNearEnd;
    float cbLensflareFadeFarStart;
    float cbLensflareFadeFarEnd;
    float cbLensflareFadeByAlphaRate;
    float cbLensflareResolutionScale;
    uint32 cbLensflareFlags;
    float cbLensflareInterleaveScale;
    uint32 cbLensflareOcclusionID;
    float cbLensflareReserve1;
}Here is another frame example that spends quite longer time in the Lens Flare Image creation (more complex) and it uses pretty much the exact same set of helper textures.


Late Particles
While Early Particles get drawn right away into the frame, in addition to a Mask, the Late Particles get drawn entirely into their own image, so you can consider this step as something called Late Particles Image. The generated particles image is not be be added to the frame yet, and it is something to be done later with the Motion Blur and DOF if existed.
Like mentioned earlier that the Late Particles seem to be only taking place at the case of Cinematics or some very unique effects that would go through a “Blend” mode into he final frame (like a Photoshop or GIMP Blend Layer basically). Here is one example for that, as the previous Gameplay frame used in showing Early Particles doesn’t have a Late Particles phase.


And of course, it is not something that happen at once, in action, it goes as follow..

The data and/or structs used to help in this phase is pretty much similar to the ones used in the Early Particles phase.
And in order to make separation more clear between Early Particles and Late Particles, here is how they both participate in that frame


(after MB & DOF, here for clarity)
1st image is the frame withe the Early Particles
4th image is the frame with the Late Particles (post MB and DOF)
Clearly you can tell it has been composed into the frame as a “Blend” from the loss of intensity from the Late Particle Image.
Post Processing
Anti-Aliasing (FXAA+TAA)
The RE Engine signature that been used & proven quality for quite sometime now, the mix of FXAA+TAA. Using velocity and counting on the previous frame in addition to the Effects Mask (from the Early Particles step) AA gets to work. One thing here, the Effects Mask needed for responsive AA, so tiny particles don’t just get washed out.


If you’re questioning the format for the Velocity, it is because the Velocity XY are stored in the RG components of one of the gbuffer images that holds Velocity X (R), Velocity Y (G), Ambient Occlusion (B), and SSS Mask (A).


Anti-Aliasing Structs
//Yes! The AA required data are passed through the Tonemap struct
struct Tonemap {
    float exposureAdjustment;
    float tonemapRange;
    float specularSuppression;
    float sharpness;
    float preTonemapRange;
    int32 useAutoExposure;
    float echoBlend;
    float AABlend;
    float AASubPixel;
    float ResponsiveAARate;
    float OpacityResponsiveAARate;
    float StopClampWindowSize;
    float VelocityWeightRate;
    float DepthRejectionRate;
    float ContrastTrackingRate;
    float ContrastTrackingThreshold;
    float LEHighlightContrast;
    float LEShadowContrast;
    float LEDetailStrength;
    float LEMiddleGreyLog;
    float LEBilateralGridScale;
    float LEBilateralGridBias;
    float LEPreExposureLog;
    int32 LEBlurredLogDownsampleMip;
    float CBTonemap_Padding;
    vec2i LELuminanceTextureSize;
}Motion Blur [Compute] [Not always]
Motion blur done pretty much exactly the same way RE Engine been doing it for years, it was explained earlier in details. But here below the core steps and few notes about them. Feel free to refer to the Resident Evil breakdown’s Motion Blur section for any further details or notes.
1.Tile Max H
Generate the PreComputedVelocity from the given packed velocity texture (VelcoityXY + AO + SSS), and use the output in addition to Depth to generate the Generate TileMaxH (the very tall famous image, full render resolution height but width of a tile).


2.Tile Max
Continue with the TileMax vertically this time, in order to end up with full Tile Max texture

3.Neighbor Max
NeighborMax from TileMax

4.Composite
Composite to the frame using the PreComputedVelocity


Motion Blur Structs
struct MBSetting{
    float MBInvertIntensity;
    float MBIntensity;
    vec2f MBProjJitter;
    vec2f MBVelocityTexSize;
}DOF [Compute] [Not always]
Depth of Field as well is done here pretty much the exact same way RE Engine been doing it for the past several years, and the method for DOF was explained in detail in the Resident Evil article, below we’ll go though it once more, but it is 1 : 1 to what been in the engine since Resident Evil remakes.
1.Tile Max Heigh
Depth to generate the Tile Max Heigh, you can think about this as a template for the tile size.


2.Tile Max
Use the pervious output to generate the TileMax rendertarget (first step in having complete Near & Far tiles mask)

3.Neighbor
Generate the Neighbor rendertarget, which is basically the complete Near & Far fields (mask) that is packed in R11G11B10_FLOAT (credits to this cool trick to Crysis/Cryteck/CryEngine)

4.CoC
Using the Depth + HDR Image + Neighbor (generated in previous step), we finally calculate the CoC, and at the same time downscale the HDR image to 1/2, so we have a version that is same size as CoC.


5.DOF Image
Now use that outputs of the previous dispatch (CoC & Downscaled HDR) + the neighbor, so we can calculate a CompressDOF, and DOF A. This is a good decision, i mean separating into two rendertargets, check the formats and you know what i mean. Also keep in mind at this case the CompressedDOF is fully white (it is red below due to the R32_UINT).


6.Compress DOF Image
Using the CompressDOF to apply to the Downscaled HDR, so we can get an output of the first pass of the DOF…a fully blurry image!


7.Compose
Put all together at once, also during this step will compose something like the Late Particles that was prepared, but yet never composed. So it gets composed here too with the DOF.


DOF Structs
struct dof{
    float coc_bias;
    float coc_scale;
    float focal_plane_depth;
    float pcoc;
    float quad_reduction_threshold;
    float quater_resolution_threshold;
    float near_blur_scaler;
    float depth_adjuist_factor;
    float bokeh_intensity_threshold;
    float bokeh_shape_factor;
    float dof_single_pixel_radius;
    float dof_aspect;
    vec2f base_screen_size;
    vec2f base_screen_inverse_size;
}MB & DOF Note
Motion Blur & Depth of Field are clearly mostly compute based, and that makes them in timelines would look confusing most of the time. As in some frame, Motion Blur seem to comes first, then Depth of Field, where in other frames it is the opposite order. But this is clearly just a visual thing in frame timeline due to the way our tooling still not really super compute friendly, but in general both effects are going into compute about the same time.
Lens Flare Composite (Fake Lens Flare)
Remember the Lens Flare Image that was prepared few steps earlier, now is the time to composite it to the frame. One interesting observation, as mentioned earlier that preparing the Lens Flare Image step may be bypassed in many frames, but as a matter of fact, the compositing step of the Lens Flare Image (this step) is taking place all the time, regardless the Lens Flare Image has any content or totally empty & skipped!


– Swapchain put here just for reference
Fake Lens Flare (Lens Flare Composite) Structs
struct CBFakeLensflare {
    float cbFakeLensflareBorderWidth;
    float cbFakeLensflareBorderOffset;
    vec2f cbFakeLensflareJitter;
}Lens Effect [Not Always]
1.Downsacle
Scale the frame to 1/4 of the target resolution, at this case 960*540, as this target will be the base for many things in the following step

2.Blur Textures
The goal of this step is to simulating the effect of a lens (Polynomial Lens) that eventually enhancing the frame by some bloom & luminance, this is done by scaling down & up the frame to 1/4 at max (960×650) and 1/64 at lowest (60×33), and blurring the frame the same way you would do bloom basically. Doing this in order to generate multiple blur textures at multiple size.
So basically, scale down, then blur Horizontal, then Vertical, then repeat, till reaching the lowest allowed resolution. like that:

2 Blurs, 4 Times
These are the final outputs from this stage that we will need later


3.Streak Textures
Taking the 1/4 blurred version from the Blur Textures generated earlier, and use it around a kernel to generate multiple streaks in multiple directions. The reason to do that, so we can get some sort of Convolution Bloom eventually, but it seem all generated on the fly, and no kernel image or pattern is given. That jittering goes as follow:

All steps (despite the gif seem repetitive, it is longer than you think!)
These are the final outputs from this stage that we will need later


4.Luminance Texture
Compose Blurs + Streaks from the previous two steps into one texture, called the Luminance Texture

5.Final Compose
Compose the Luminance Texture (Blurs + Streaks) into the final frame


Lens Effects Structs
struct PolynomialLensConstant {
    float cbThreshold;
    float cbScaler;
    float cbExposureCorrection;
    float cbLimiter;
    float cbTexelOffsetX;
    float cbTexelOffsetY;
    float cbReferenceTexelWidth;
    float cbReferenceTexelHeight;
    float cbFeedbackThreshold;
    float cbFeedbackRate;
    float cbUniformHighlightRatio;
    float cbPolynomialLensConstantReserved;
}

struct LensEffectConstant {
    vec4f cbColorCoeficient[4];
    pad384;
    vec4f cbParameters;
    float cbTargetOffsetX;
    float cbTargetOffsetY;
    float cbReferenceTargetWidth;
    float cbReferenceTargetHeight;
}

//for the last two composing steps (compose all into a luminance texture and compsing that luminance texture  into the frame)
struct ComposeConstant {
    vec4f cbMixCoefficient;
    vec4f cbBlurCoefficient;
}Soft Bloom [Not Always]
Soft bloom taking place in simple distinctive steps similar to may that we’ve explored in the past (a 100% not like Detroit!).
This step is flagged as [Not Always] while there are presence of bloom during the entire game, as there are two variations of the Bloom & Blur pipelines. During regular gameplay, this Soft Bloom will kick as long as there is a need for it. But during Cinematics, the step discussed above “Lens Effect” is enough in simulating bloom as part of the lens, and it is kinda looking much high quality Bloom (Convolution Bloom).
1. Bloom Image
The goal of this step is to produce a 1/2 of the target resolution Bloom Image, by scaling the frame in two directions. It is a 4 steps bloom (scale down 4 times, then scale back up 4 times).
i. Scale Down
Taking the frame from 3840*2160 down to as low as 120*67


ii. Scale Up
Taking it back up again from 120*67 up to the target Bloom Image resolution —1/2 of the internal resolution— of 1920*1080


2. Composite Bloom Image
Composite Bloom to the frame


Looking at that frame, and telling myself: “This game was made for Bloom…Or in fact Bloom was made for this game!!”
For the purpose of Bloom-ing, these structs below are used. Some of them for scaling up only, were others for scaling down & up, and some would be only during composite, and others would be during all steps.
Soft Bloom Structs
struct cbSoftBloom {
    vec3f cbBloomColor;
    float cbThreshold;
    vec3f cbDirtMaskTintColor;
    float cbOutputRatio;
    float cbDirtMaskIntensity;
    float cbDirtMaskThreshold;
    vec2f cbSoftBloomReserve;
}

//used for scaling down & up
struct cbSoftBloomSrcResolution {
    vec4f cbSoftBloomSrcDimension;
}

//used for scaling up ONLY
struct cbSoftBloomScale {
    vec2f sizeScale0;
    vec2f sizeScale1;
    vec2f sizeScale2;
    vec2f sizeScale3;
    vec2f sizeScale4;
    vec2f sizeScale5;
    vec2f sizeScale6;
    float inverseReductionBufferCount;
    float cbSoftBloomScale_reserve;
}

struct cbCone {
    vec2f cbConeDistance;
}And here is another Soft Bloom sample frame


Bottom row, up scale


Radial Blur (Prepare) [Compute]
In this step will compute the result for Radial Blur to be consumed in the “Sub-Post-Processing” step below.
Nothing fancy to show in this step, it is all numbers.
Radial Blur Structs
struct CBRadialBlurCompute {
    vec3f cbWorldPos;
    uint32 cbRadialBlurComputeFlags;
    float cbOccludeScale;
    uint32 cbOccludeSampleCount;
    float cbFadeInnerCone;
    float cbFadeOuterCone;
    vec3f cbFadeTargetDir;
    float cbFadeAlphaRate;
}

struct RadialBlurComputeResult {
    float computeAlpha;
}If the struct[s] looks familiar, even with the name, that is because it is the exact same implementation & shader[s] from Resident Evil.
Sub-Post-Processing
Multiple effects taking place in one step using one shader. Still the engine refers to this stage as “LDR PostProcess With Tonemap“, but i still prefer to call this step a sub-post-processing, as it is kinda a sub-pass. These are not necessarily all taking place, it depends on the frame and the visual intention, but all in all, this shader invocations includes things such as these ones below. And it is worth mention that this entire step is pretty much exactly carried over from the Resident Evil version of the engine, the only difference now maybe that small structs that used to be in the shader are all merged into a larger structs. Instead of having around 10 small structs as used to be the case with Resident Evil, now there are around 2 main large structs.
Where all previous post processing where taking place in their own dedicated passes (most of the time, things are mixed at some cases) using different shaders and different buffers of params, but here at this stage, there is a whole lot of post processors are applied all at once in a single shader, and because of that, it makes it hard to see the output of each post-processor before another one get applied, so we can have an overall view of what gets into the pass & what comes out of the pass.
Tonemapping
Film Grain
Lens Distortion
Color levels
Color Correction
Haze Filter
Gradation
Aberration
Refraction
Radial Blur
And here is the impact of that full stack of post-processors all together combined on a given frame..


And here are some more examples to satisfy your eyes. At some frames i’ve got the feeling that it in fact looked much more pretty & less exaggerated without post processing..


Bottom row, Out
The art director in that project really loves aberration and lens distortion!! Not a single frame free of lens effects!
Sub-Post-Processing Structs
struct TonemapParam {
    float contrast;
    float linearBegin;
    float linearLength;
    float toe;
    float maxNit;
    float linearStart;
    float displayMaxNitSubContrastFactor;
    float contrastFactor;
    float mulLinearStartContrastFactor;
    float invLinearBegin;
    float madLinearStartContrastFactor;
    float tonemapParam_isHDRMode;
    float useDynamicRangeConversion;
    float useHuePreserve;
    float exposureScale;
    float kneeStartNit;
    float knee;
    float curve_HDRip;
    float curve_k2;
    float curve_k4;
    mat4x4f RGBToXYZViaCrosstalkMatrix;
    mat4x4f XYZToRGBViaCrosstalkMatrix;
    float tonemapGraphScale;
    float offsetEVCurveStart;
    float offsetEVCurveRange;
}

struct LDRPostProcessParam {
    float fHazeFilterStart;
    float fHazeFilterInverseRange;
    float fHazeFilterHeightStart;
    float fHazeFilterHeightInverseRange;
    vec4f fHazeFilterUVWOffset;
    float fHazeFilterScale;
    float fHazeFilterBorder;
    float fHazeFilterBorderFade;
    float fHazeFilterDepthDiffBias;
    uint32 fHazeFilterAttribute;
    uint32 fHazeFilterReductionResolution;
    uint32 fHazeFilterReserved1;
    uint32 fHazeFilterReserved2;
    float fDistortionCoef;
    float fRefraction;
    float fRefractionCenterRate;
    float fGradationStartOffset;
    float fGradationEndOffset;
    uint32 aberrationEnable;
    uint32 distortionType;
    float fCorrectCoef;
    uint32 aberrationBlurEnable;
    float fBlurNoisePower;
    vec2f LensDistortion_Reserve;
    vec4f fOptimizedParam;
    vec2f fNoisePower;
    vec2f fNoiseUVOffset;
    float fNoiseDensity;
    float fNoiseContrast;
    float fBlendRate;
    float fReverseNoiseSize;
    float fTextureSize;
    float fTextureBlendRate;
    float fTextureBlendRate2;
    float fTextureInverseSize;
    float fHalfTextureInverseSize;
    float fOneMinusTextureInverseSize;
    float fColorCorrectTextureReserve;
    float fColorCorrectTextureReserve2;
    mat4x4f fColorMatrix;
    vec4f cvdR;
    vec4f cvdG;
    vec4f cvdB;
    vec4f ColorParam;
    float Levels_Rate;
    float Levels_Range;
    uint32 Blend_Type;
    float ImagePlane_Reserve;
    vec4f cbRadialColor;
    vec2f cbRadialScreenPos;
    vec2f cbRadialMaskSmoothstep;
    vec2f cbRadialMaskRate;
    float cbRadialBlurPower;
    float cbRadialSharpRange;
    uint32 cbRadialBlurFlags;
    float cbRadialReserve0;
    float cbRadialReserve1;
    float cbRadialReserve2;
}

struct RGCParam {
    float CyanLimit;
    float MagentaLimit;
    float YellowLimit;
    float CyanThreshold;
    float MagentaThreshold;
    float YellowThreshold;
    float RollOff;
    uint32 EnableReferenceGamutCompress;
    float InvCyanSTerm;
    float InvMagentaSTerm;
    float InvYellowSTerm;
    float InvRollOff;
};

struct CBControl {
    vec3f CBControl_reserve;
    uint32 cPassEnabled;
    mat4x4f fOCIOTransformMatrix;
    RGCParam cbControlRGCParam;
}Sharpen (AMD’s CAS)
Yet another RE Engine famous signature, the AMD implementation that seems to be very favored by the RE Engine team as i’ve been noticing it in pretty much every RE Engine based game. It is yet another compute dispatch that runs on the the most recent version of the SrcImage (yes, still exact same name of the resource from previous RE Engine games, but iirc this is back to the CAS shader itself, not RE choice) that just came out of the previous step, but this time the dispatch is the “Contrast Adaptive Sharpening” or CAS for short. The impact of CAS is very subtle, but can still be noticed in either Gameplay or Cinematic frames.


And because why not, here are some variations of frames between gameplay & cinematics.


Bottom row, Outs
all in 3840*2160 of R11G11B10_FLOAT
Note: the popping in the 5th frame (the explosions frame) is due to the gpu capture corruption. i replayed the demo many times to capture this section, and every time the entire frame capture gets corrupted, but this version was the best i can get (unfortunately no checkpoints in the demo). This capture has some corruptions here & there during the emulation but not in all resources/target
i won’t blame you if you see it negating some of the fancy work been done in the frame so far. To a degree yes it does, but not always. We talked about that issue earlier in the Resident Evil breakdown, give that short section a read if you’re interested.
CAS Structs
struct cbCAS {
    vec4u const0;
    vec4u const1;
}

cbuffer cbCASUBO : register(b0, space0)
{
    float4 cbCAS_m0[2] : packoffset(c0);
};Color Grading (LUT)
Color grading with a lookup table (LUT) and format change of the output to match the LUT given format


Here are some more frame variations..


Bottom row, outs, R10G10B10A2_UNORM
LUTs are pretty close…al always!
UI Prepare [Not Always]
While this sounds like a Post-Processing, but in fact i personally see what happens during this step is not part of post-processing, as it is not with any mean a contributor to the final frame itself, but is it a contributor in the UI system (more below about this).
1.Format Change
A not always step, and it is not a Cinematic thing, it is mostly for Gameplay purposes, and it is just back to the state of “what” we want to show on the final frame as you’ll see in the next step. Taking the output HDR Image from the previous step, change format once again but this time to the 64-bit floating-point format R16G16B16A16_FLOAT in order to be ready to be used for the next step Blur Filter, which requires such floating-point precision.

couple more..


2.Blur Filter
This step is tied to the previous step as mentioned the format change done is to server here. So if the previous step was absent, this is because there will not be any application for the Blur Filter during the frame.
Also worth noting that this Blur Filter step is pretty much a Gameplay thing only if ever existed, and it is 100% absent in Cinematics, as it is not needed anyways.
The main goal of this step is to produce a 1/2 resolution separable-ly blurred version of the frame —1920*1080 at my case— you can call it the Blur Filter Image, that will be used with the “very impressive” 3D UI rendering tech, as parts of the 3D UI widgets would most of the time need to mask the frame behind them (will see that shortly below). So basically the rules are, it is not during Cinematics, and it is only during Gameplay if there will be some UI elements benefitting from the Blur Filter output Image, so not all Gameplay moments would have this step either. This is why i was hesitating for quite sometime in leaving this as part of the Post-Processing, and later on decided to remove it from under the Post-Processing umbrella and put it under its own section of UI Prepare.
Blur Filter always in a two-step fashion (aka separable)
i.Horizontal


ii.Vertical

Put it all together, and plus few more Gameplay examples..


Even with the minimal amount of 3D UI Widgets, such as that 4th frame, we get the 2-step Blur Filter
Blur Filter Structs
struct CBSystemBlurFilter {
    vec2f CBSystemBlurFilter_blurSize;
    vec2f CBSystemBlurFilter_alignment_dummy;
    vec4f CBSystemBlurFilter_guiFilterBaseLuminance;
    vec4f CBSystemBlurFilter_guiFilterGaussianKernelTbl[2];
    pad192;
}UI [Not Always]
The UI in this game looks really interesting, it has some tricks here & there to deliver the unique visual identity, and it all started at the beginning of the frame where we’ve seen 3 full widgets are rendered into 3 images, to be later used right away as a quad, so it can be duplicated to simulate a layer ghosting effect. That was the very first part of the UI, but done very early.
The rest of the UI is done here at two distinctive steps, at first we get everything draw to what so called “UI Image” and then, that UI Image get composed to the final frame in order to finalize & present.
UI is not an always exist step, but it is there most of the time at least during Gameplay, and even during Cinematic frames where there are subtitles, UI will be processing (with minimal effort of course).
UI Draw (Prepare UI Image)
The main goal of this step is to output the full resolution UI Image (+ its Mask), by doing a long sequence of mostly regular UI draw commands.
The main input for this step is the Depth in full resolution (as there are parts of the UI are drawn in 3d as worldspace 3d widgets), in addition to the Blur Filter 1/2 resolution image made in the step right before the UI.


Drawing item by item into the UI Image and its alpha channel. The UI Mask stored in the alpha channel is clearly needed for UI Compositing later.


Left is RGB channels, Right is A channel
Click to open 4K on YouTube
If you did not notice, you can observe things that been prepared earlier, such as the Blur Filter Image of the frame in 1/2 res (it get Masked behind some Elements, most notably the Hacking Window) and the 3 bottom UI Widget Images for Health & Weapons (each get re-drawn multiple times to deliver the Layers Ghosting Effect).
In order to do that, you might have noticed that there are some form of smart masking taking place, some times it is in worldspace, and other times it is in screenspace. During all draw calls, if the item in process would need a mask, the mask is prepared for it in full rendering target resolution. So not everything get that treatment, and for that given frame example, there are around 11 masks used (or better say re-used).


3840*2160 – R8_UNORM
If it is not very clear what the masks are actually doing in the UI, here are few examples of the impact of the mask during a UI element draw commands. Heads up, i picked the largest 2 masks in the list to showcase, others may seem large, but during draw the impact was not very easy to spot.


Another example, just couple of commands after


And one more example, hope it makes it clear.


For all this to happen, a great collection of pre-authored image resources —in addition to the full widget-to-image resources generated at the beginning of the frame— are used.


It is worth noting that there is an attachment that keeps getting updated frequently every few frames (where it is needed), this in full resolution 3840*2160 of R8_UNORM and it seem to be used to draw the 3d widgets in the worldspace, it is always get written to, and it never read from or get transitioned or barriered.

And to put this step all together..


UI Composite [Compute]
A compute dispatch to compose the generated UI Image in the previous step into the final frame!


UI Structs
//Used during both of the UI phases
struct SceneInfo {
    mat4x4f viewProjMat;
    mat4x3f transposeViewMat;
    mat4x3f transposeViewInvMat;
    vec4f projElement[2];
    pad192;
    vec4f projInvElements[2];
    pad192;
    mat4x4f viewProjInvMat;
    mat4x4f prevViewProjMat;
    vec3f ZToLinear;
    float subdivisionLevel;
    vec2f screenSize;
    vec2f screenInverseSize;
    vec2f cullingHelper;
    float cameraNearPlane;
    float cameraFarPlane;
    vec4f viewFrustum[8];
    pad768;
    vec4f clipplane;
    vec2f vrsVelocityThreshold;
    uint32 GPUVisibleMask;
    uint32 resolutionRatioPacked;
    vec3f worldOffset;
    uint32 sceneInfoMisc;
    vec4u rayTracingParams;
    vec4f sceneExtendedData;
    vec2f projectionSpaceJitterOffset;
    float tessellationParam;
    uint32 sceneInfoAdditionalFlags;
}

//Used during both of the UI phases
struct GUIConstant {
    mat4x4f guiViewMatrix;
    mat4x4f guiProjMatrix;
    mat4x4f guiWorldMat;
    float guiIntensity;
    float guiSaturation;
    float guiSoftParticleDist;
    float guiFilterParam;
    vec4f guiScreenSizeRatio;
    vec2f guiCaptureSizeRatio;
    vec2f guiDistortionOffset;
    float guiFilterMipLevel;
    float guiStencilScale;
    uint32 guiDepthTestTargetStencil;
    uint32 guiShaderCommonFlag;
    vec4f guiAdjustAddColor;
    float guiTextureSampleGradScale;
}

//NOT used during the compositing dispatch
struct CheckerBoardInfo {
    vec2f cbr;
    float cbr_scale;
    float cbr_using;
    vec2f cbr_padding;
    float cbr_mipmapReadjustRatio;
    int32 cbr_mipmapReadjustable;
}

//Used during the compositing dispatch only
struct OutputColorAdjustment {
    float fGamma;
    float fLowerLimit;
    float fUpperLimit;
    float fConvertToLimit;
    vec4f fConfigDrawRect;
    vec4f fSecondaryConfigDrawRect;
    vec2f fConfigDrawRectSize;
    vec2f fSecondaryConfigDrawRectSize;
    uint32 uConfigMode;
    float fConfigImageIntensity;
    float fSecondaryConfigImageIntensity;
    float fConfigImageAlphaScale;
    float fGammaForOverlay;
    float fLowerLimitForOverlay;
    float fConvertToLimitForOverlay;
}Present
Final image presented in R10G10B10A2_UNORM in the final target resolution of 3840*2160.
Life of a Frame [Rendering Graph]
Over the years we tried multiple formats to summarize the journey we took in the frame, and yet seemed the Miro graphs were the most successful ones. With the fact that i ran out of free miro graphs, i had to improvise, so i decided to share Detroit’s one with all other games, and make it a single graph that contains any Behind the Pretty Frame made or will be made. So while the graph below showing PRAGMATA, but if you zoom & scroll, you’ll see Detroit (and other future games)
And here is an image of that graph, just in case miro service discontinue someday in the future or something! But navigating that graph above is the intended way, don’t check the image below unless you can’t open the graph.
TODO::upload Miro graph image
Extra Stuff for Future Investigation
Something like Volumetric Fog (Volumetric Effects) are one of the things that interests me, but unfortunately there weren’t too many in the demo, and the very visible occurrences, every time i took captures in there, it was corrupted.
Deeper digging into Ray Tracing details.
Engine General Observations
Shader compilation
Every time i was launching the game, i was faced by the shader compilation screen that take sometime to recompile shaders. Not sure why the game does that, i would understand that if i got an game updated through steam or did some driver update, but that was never the case. i close the game, do some digging or writing, back to open the game after few minutes or few hours, and it recompile shaders again! i hope this issue get resolved, it is little annoying.
Graphical settings
Graphics Settings is one more annoying thing, as it is 100% synced over steam cloud between devices. While cloud save is great feature for any game nowadays, but always has its culprits that developers may miss, one of the most important things, is not to sync all user preferences, as this would cause issues if it is hardware dependent. My use case was that, as mentioned earlier, once i got an email notification about the demo, i installed it on Steam Deck, and did my first play though on Steam Deck. A day later, i went to play on PC, and as soon as the game installed — and Steam did the cloud save automatically— launching the game on my PC, the entire quality was matching Steam Deck, and this included the display resolution. And that is little odd, as if i’m a gamer that are not aware of what is going behind the scenes, i would have though that this is the default or recommended quality of the game! At my case, i had to change the settings one by one. Jumping back & forth between Steam Deck and my PC to re-play the demo every time i get a chance, was little annoying.
A …Thought
While the game looks great and it appeals to me, but it was always the case that not every game i liked cashes out. Not to mention the multiple elephants in the room, from the fact it releases on 2026 after being delayed few times, or being a brand new IP with a brand new gameplay mechanic, where it is always quite vague and risky to test new waters in gaming industry. Also while the demo played nice on my PC and even on Steam Deck, but looking into the longer trailers every time a new one is coming, i sense something with the performance of the game, specially in combat areas or open exterior environments, if the marketing videos are not butter smooth @ 60 fps, then what about the game itself?! i could be wrong — and i wish from all my heart i’m wrong— and it is just me with my eyes issues, and the videos are 100% fine, but i’ve observed such a thing with other games in the past!
All these things combined giving me a little bad internal feeling about how the game will be doing, and i hope i’ll be 700% wrong and it performs super great. We are in a very critical need for the success of such games, games that are not afraid of innovating, telling new stories and hooking us with new characters, and most importantly knocking new doors and pushing the gaming industry forward.
Epilogue
This is the first time ever in the series to breakdown a game before it technically releases! Yes, it is an official demo, but the final game won’t be very different i believe. If you reached this line, so you probably worked in the industry at any level, from indie to AAA, and we all know that by the time the a demo goes live few months before release, there is probably a full game build ready, if not locked & passed platform certification already and the team maybe is working on day 0 patch, or other future DLCs. So chances to make core changes in the renderer are low in my opinion.
Every time a game interests me to look under its hood, it take time, either for me still behind in my steam backlog, or me don’t have enough time for a side quest, or me waiting for a proper sale because my gaming budget is already draining,…etc. It never was the case that i had a chance to look under the hood of a game in its first week, now i had the chance to do that pre-release, and thanks to the Sketchbook demo Capcom put early.
i wish good luck to the game, i’m sure it will do pretty great, it is promising & amazing game, and the demo showed super great potential in terms of interesting gameplay, characters and story. Good luck to the game, good luck to the team behind PRAGMATA, good luck to the RE Engine team, good luck to the entire Capcom,..and of course, good luck to Hugh & Diana in their journey!

Yeah, baby. We did it!
-m
Related Readings & Videos
Behind the Pretty Frame Resident Evil (2, 3, Resistance, and Village)
Pragmata – On <3 Fandom <3
Pragmata Story – Capcom homepage
Pragmata Characters – Capcom homepage
Pragmata Gameplay – Capcom homepage
HLSL Shader Model 6.8
DXGI_FORMAT enumeration (dxgiformat.h)
Wikipedia – Separable filter
Automatic Exposure Using a Luminance Histogram